Showing posts with label WW2. Show all posts

Friday, 20 July 2018

Chain of Command

After waiting for FOF for WW2 for longer than... WW2? I gave up and started looking at what was on offer.  After reading rules and watching some videos I decided to give Chain of Command a go.  Only problem was finding someone who was keen to play Historical in the domain of fantasy and SF.  I made the mistake of going 28mm, and set about replacing all my terrain.  Time passed.

And then someone showed interest.  We played our first game of CoC.  I was impressed, it gives a good flavour, gives you lots of hard choices, and has lots of support with campaigns, so no fear of powergaming.

Even the patrol phase was tense and fun.  Here are a few pics from our game.  We made lots of mistakes, rule wise and tactically.  Like, I ended up dividing two of my gruppe before I realised the cost.

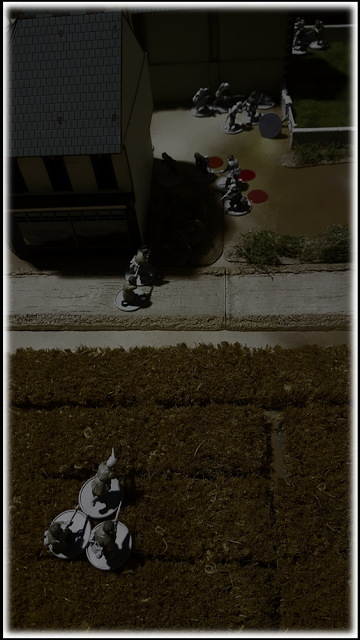
The Fallschirmjaeger get an order to run as far as possible to the corner, and end up running way to far. 

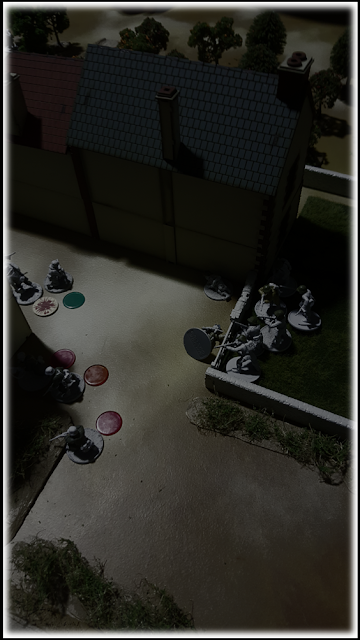
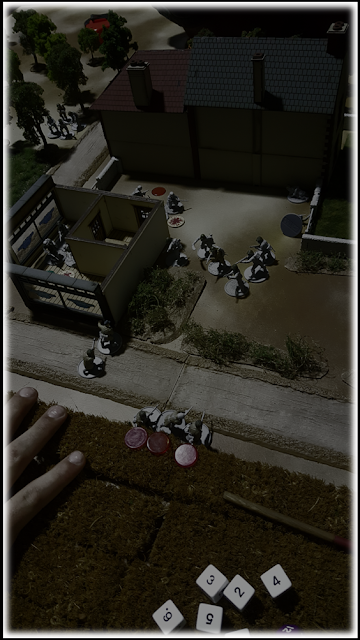
Germans and US Paratroopers engage amongst the hedges on the east edge of St. Du Mont. 

The elite US pour on the hurt. 

The bocage in the distance becomes a pain, splitting up a squad of Germans and making it difficult to move. 
A very good game was had.

Saturday, 5 August 2017

FOF extended WW2 Vehicle list


The EXCEL calculation file can be downloaded from Google docs at this link: https://drive.google.com/file/d/0B9dspKYuoIlUNVZUc1VkNHRHcU0/view?usp=sharing

Note that the vehicles with a white or grey background have not had their machine guns added.

Friday, 16 December 2016

AAR: Americans vs. Russians vs. Germans vs. Americans

The US paratroopers ran towards the hamlet, when they got close they slowed and moved forward gingerly, the 101st on the right side of the road and Sergeant Trudeau's 82nd men on the left hand side.  Sergeant Trudeau had asked the 101st men to flank to the right or find a good overwatch position and give enfilading fire.

We played the three way mission yesterday (from: https://bigfof.blogspot.com.au/2016/12/mission-briefing-americans-vs-russians.html).  Please excuse the lack of painting, though luckily we played a moonlit
 night mission so not too bad.
The three Russian teams, the unconcious US Paratrooper McBride in the shadow, and the dead Fallschirmjäger sergeant against the low wall.
At the T-junction the Fallschirmjäger sprang into action, they would rescue their fallen commander (and take revenge) and capture the US paratrooper.
The four Fallschirmjäger units at the T-junction and at the bakery.  In the top middle you can see the seven Ost Truppen, and if you have good night eyes you may even be able to see the unconcious McBride.
The German paratrooper team of two and the three man team from down the road moved to gain LOS to the Ost Truppen behind the bakery, their combined fire bowled over the three closest Russians.
German paratroopers firing on the Ost Truppen.  In the distance (top right) the US Paratroopers slowly move forward, happy to let the German paratroopers and Ost Truppen slug it out.
The German team outside the front door of the bakery entered the bakery and moved to the rear door, each pulling out a grenade.  Two grenades went out the door, but, unfortunately for the attackers one grenade was fumbled injuring their own man.  Two Russians went down in the concussions.
Two Russian casualties outside the rear bakery door, and two Germans down on the inside, one self-inflicted wound.
The Russians around the unconscious US paratrooper galvanised into action and charged into the bakery, the last surviving German paratrooper was stunned by the sudden attack and went down in a flurry of rifle butts.

The US paratroopers deemed it what time to strike, they rushed up to the wall and sent a rain of grenades down on the Russians (10 DICE worth!).  The surviving Russians, who were still busy sorting themselves out from the casualties caused by the Germans, fell in the explosions.
The US paratroopers move into the yard and fire at the surviving Russians.  The 101st Airborne move up and pour in enfilading fire.
The US decide it will be easier to just annihilate all the enemy rather than grab the injured paratrooper (the local professional hand model joined us...sigh.)
The US paratroopers seeing the power of their SMG and grenade attacks decided it would be safer to annihilate the enemy than try grab their fallen comrade, they charged in hurling grenades, knocking out the Germans in the ditch across the road.  The 101st Airborne continued to pour fire into the Russians before moving up and spraying the Russians in the bakery.  Eventhough the Russians shouted, "Komeraad! Komeraad!"  The US were no mood to take prisoners, enemies were left to die without aid and some were helped along.

The small teams of German paratroopers melted away in front of the heavy US attack and Sergeant Trudeau was able to give Private McBride the aid he needed, the paratroopers formed a litter and headed back the way they had come.

The next morning Leutnant Merkel awoke.  With his head pounding from his night of "passion" he found Madame Sophie and her girls outside cleaning up the bodies from inside the goat pen.  All his squad lay dead.  And so did at least a squad of German paratroopers.  Madame Sophie was pestering him about her dead goats.  He rubbed his chin, then shrugged, when his head was clear he would need to fabricate an excuse.  He waved at Madame Sophie and trudged back to his camp.  He heard gunfire in the distance.  "Odd," he thought, shrugged and continued on his way.  Until he was shot by a US paratrooper.

Well.  Nasty.  The big US paratrooper team with SMG and optimum bonus (plus grenade bonus) proved extremely nasty vs. the small 3-4 man units.  Basic lesson: Do not get close to these big groups. The US lost no one to injury or death.  So good for the campaign.

Tuesday, 13 December 2016

Mission Briefing: Americans vs. Russians vs. Germans vs. Americans

A three way WW2 Force on Force mission in Normandy.  Is it balanced?  I have no clue.
Café Rouge Lumière
Briefing: Leutnant Axel Merkel did what he did most nights.  He followed orders.  His orders were to ensure the Ost Truppen (Russian) he was given were trained in night maneuver.  Merkel was 52 years old, he was proud of saying, "I am like the Fuhrer, I was a Corporal in France in 1918."  Back to his orders. Each night he selected one of the gruppe in his zug and took them on a night patrol to Café Rouge Lumière, Madame Sophie Allemands-pour-l'argent would take the good Leutnant upstairs, after a few bottles of Calvo' he was ready...to sleep.  Downstairs, the lucky gruppe would get to share a bottle of Calvo' with some home brewed Vodka.

By 11pm on the 5th of June Leutnant Merkel was snorning on Madame Sophie's bed and she was sitting on her sofa knitting, by midnight she had fallen asleep and the gruppe of Russians were outside wrestling the goats.

High above the Café, Private Horace McBride was the 4th man out the C-47's door.  He quickly fell the 400 feet, hit the Café's roof, slid off and landed in the yard, startling the goats and the Russian wrestlers.

The Russian's were soon upon the unconscious McBride.  At first they thought it was their Leutnant, but then they saw the parachute.  They decided the best thing to do was shoot the parachutist.

In the small lane outside the Café, Sergeant Joachim Sterballeine saw the parachute slide down the roof and into the garden.  The Sergeant was at the front of the lead element, on bicycles (the Reich's main mode of transportation after most their horses had died in Russia), of the 6th Fallschirmjäger Regiment   He told his men to fan out and went to investigate with one private.  He found a group of "shirtless" Russians gawking and about to shoot the unconscious American.  He ordered them away.  They shot him dead.  The private who was standing next to his now dead sergeant started running and screaming.  All pandemonium broke out.

One hundred yards away Sergeant Trudeau hit the dirt with the report of a single rifle shot.  Then they heard awful screams.  Having seen one of his men hit the roof of the building he feared the worst.  On landing he had quickly found five of his men, and a group of 101st Airborne joined him.  Ordering the men to follow, he ran towards the hamlet.

Leutnant Merkel slept on.
The bakery at the T-junction and in the back Café Rouge Lumière

TURNS:
6
INITIATIVE: US Airborne
CONDITIONS: Moonlit night (pass TQ to fire at enemy beyond double TQ range)
MAP: Small 3x3, three buildings, road, orchard and farmyard
Victory Conditions: Whoever holds the wounded US paratrooper wins at the end of Turn 6.  The wounded paratrooper cannot be killed.

US Airborne
INI D10
TQ D8
MOR D10
Sergeant Trudeau's team, Squad 1, Platoon 1, Kilo Company, 508th P.I.R., 82nd A.I. Division
1 Sergeant w\SMG
4 w\Self-Loading Rifle
1 w\Self-Loading Rifle + Rifle Grenade (+1)

101st Airborne team
1 Corporal w\Self-Loading Rifle
3 w\Self-Loading Rifle

Special Rules: "Loaded With Grenades" (at Optimum range add 2D instead of 1D).  Until fired upon US will not attack enemy beyond optimum range.

Ost Truppen (Russians in German service)
INI D6 (Calvados + Vodka)
TQ D6  (Calvados + Vodka)
MOR D12 (Calvados + Vodka)
Gruppe Team 1
1 w\SMG (Leader)
3 w\Bolt Action Rifle
Gruppe Team 2
1 w\SMG (Leader)
2 w\Bolt Action Rifle
1 w\Bolt Action Rifle & Demolition Charge (8D)
Gruppe Team 3
1 w\SMG (Leader)
1 w\MG38 (+1D)
2 w\Bolt Action Rifle

Special Rules: Demolition Charge 8D with a 4" blast radius.  As punishment Private Ivan Trumfekov has been hauling a DC around on his back.  To make a DC attack pass an Close combat assault, move, drop charge and move as far away as possible (maybe not far enough!)

German patrol, I Battalion, 6th Fallschirmjäger Regiment
INI D8
TQ D8
MOR D8 (seeing their leader die they are uncertain)
Gruppe 1 Team 1
1 Leader w\Self-loading rifle
1 w\Self-loading Rifle

Gruppe 1 Team 2
1 Leader w\SMG
2 w\Self-Loading Rifle

Gruppe 2 Team 1
1 Leader w\SMG
2 w\Self-Loading Rifle

Gruppe 2 Team 2
1 Leader w\SMG
1 w\Self-Loading Rifle
1 w\Self-Loading Rifle + Panzerfaust-30 (Medium AP3, max range 20")

Cards
1 One of your men in this team fumbles a grenade and becomes a casualty
2 Flare, a flare turns the map area to daylight for this turn
3 A plane crashes nearby - Distraction - Gain 2D extra defense in next Round of Fire
4 Good Position - The team gains +1D defense in this position for until it moves
5 Mad Minute - Gain +2D attack in next Round of Fire
6 Leutnant Merkel appears at window and will shoot at random target until dead or game ends.  INI6 TQ6


Saturday, 10 December 2016

Force on Force WW2 tank stats

Here are the "final" vehicle and gun statistics for Force on Force Western Normandy WW2 vehicles. I have added some of the other tanks more likely to be seen on the eastern flank for comparison (white background).  I decided to not make the vehicle stats compatible with the modern tanks in the Force on Force rulebook so we have a wider range of vehicle armour and weapon penetration.

See other rule modifications here: https://bigfof.blogspot.com.au/2016/12/force-on-force-ww2-modifications.html


There do not seem to have been m/any German half-track Sd.Kfz 250/251 in the Cotentin, I left them in as we probably have the models, and the 17th SS had half-track mounted units.

Vehicle Notes
No Turret -2drm on Reaction Tests out of Front Arc
Slow Turret -1drm on Reaction Tests out of Turret Front Arc
1-Man Turret  -1drm on Reaction Tests and Spot TQ check
Slow Turret + Pivot Turn -1drm on Reaction Tests out of Turret Front Arc, unless tank hull turns as well.  Make a TQ on a 4+ apply no modifier, on a result of 1 the tank is immobilised.  For example the Panther had a slow turret, but it had the ability to Pivot turn.  So, the slow turret can be overcome by moving the hull.  Though, doing a stationary pivot held risk of losing a track or damaging the transmission. 
AP4/AT1L or AP3 or - roll a D6 on a 1-3 No MG, on a 4-5  AP3 on a 6 an AP4/AT1
Confidence Low Confidence and Confident crews must make a Bail Out Check on any anti-tank hit on the vehicle.  The check is made after any base effect.  If the base effect includes a Bail Out check then ignore the extra bail out check.  A crew may only remount its vehicle if the threat that caused the bail out is no longer in LOS of the crew AND the vehicle.
Assault, attacks DA on TQ Infantry armed with Gammon bomb may roll a TQ during an assault and attack the vehicles Deck Armour (or crew if open topped with an AP4) with an AT2L
Wet Stowage +1 die shift on crew survival rolls

Wednesday, 7 December 2016

The Company Campaign - Kilo Company goes in

On the night of the 5th of June 1944 K-Company "Kilo" of the III Battalion, 508th Parachute Infantry Regiment of the 82nd Airborne Division took to the air in nine C-47s, the group included a platoon from the 307th Airborne Engineers.  The group flew south and crossed the England coast just east of Weymouth.  The planes then flew to a waypoint to the NW of the Channel Islands and then turned for France.

Kilo Company had been given the following orders.

Landing at Drop Zone N proceed to:

Seize and destroy the crossings of the DOUVE RIVER at BEUZEVILLE-LA-BASTILLE and ETIENVILLE (PONT L'ABBE).
Seize, organize and defend the area along the general line CR (261938) - RENOUF (incl.).
Clear and secure the Divisional area within its sector, including the prominent Hill 30 overlooking the Chef-du-Pont causeway.
Assemble one Battalion without delay in area indicated as Force Reserve.
Patrol aggressively to the line indicated.
Be prepared on Divisional order to advance to the West to the line of the DOUVE RIVER.
The flight was uneventful, then they crossed the Cotentin coast at Baubigny.  Ahead lay a cloud bank, the fleet of planes flew into the cloud, the formation fragmented.  Some of the pilots fearing collision changed altitude or tried to edge away from their now invisible neighboring planes.
The planes of Kilo Company cross the French coast.  In the lead plane, plane #73, is Captain McNair and his company HQ.
The clouds had also knocked the formation off course, the flight was now south of where it should have been and flew over the FLAK at Etienville/Pont L'Abbe and Picauville.  The heavy FLAK around these two towns sent up a wall of explosions.  The fragmented formations final cohesion failed.

Two planes panicked, #76 and #78 immediately hit the green light and dropped its men.  These men were dropped in the dense bocage and orchards just to the south of Pont L'Abbe.  Once the men landed they soon realised Etienville/Pont L'Abbe was heavily garrisoned.  If they were to survive they would need to head east.  The heavy FLAK rising from Picauville to the NE pointed to another area best avoided.

2:08AM 6th of June 1944
Plane #76 (Lt Lawton, 2nd Platoon HQ and 2nd Platoon Squad 1)
Even though they were dropped well short and south of their DZ the stick left the plane in good order.  As the men descended they watched the FLAK rise up into the formations of planes to the north.   Soon they were on the ground, amongst dense bocage and orchards.  Just to the south was the small hamlet of Clainville.

GROUP 5 [3 men]
Lt Lawson quickly came across two of his HQ, Sergeant Gillem and his messenger Private Hodges, the three men waited, listening, but could not see or hear any of their comrades.   Not sure where they were they headed to Clainville.  They roused a scared French farmer out of bed, he told them where they were and that they should not to go to Etienville or Picauville as there were "many bosch...hundreds".

GROUP 6 [6 men]
1st Squad Sergeant Sutherland landed on the hill above Clainville.  Within minutes he had found 5 of his squad, including his machine-gunner.  Unfortunately, with no machine-gun.  They realised that they had not seen many other planes drop their loads and decided the best plan was to follow their planes that were disappearing into the eastern sky.  They started through the fields, heading away from Lt Lawton.

Plane #78 (Lt Bolling, 3rd Platoon HQ and 3rd Platoon Squad 1)
GROUP 7 [11 men]
Lt Bolling landed hard, hitting a tree in the orchard, breaking both of his legs.  The platoon sergeant Bull found his Lt and cut him loose.  The lieutenant was in terrible pain so Bull injected him with morphine.  Soon, eleven of the men congregated in the corner of an orchard.  Two of the men had bought in the badly injured and unconscious Private Short.  It looked like he had taken a piece of shrapnel.  Bolling ordered his men to carry him and the private to the nearest road and leave them their, then he ordered that the remaining men go and find Captain McNair and get their job done.  Reluctantly they left Lieutenant Bolling and heading in a direction that would take them south of Picauville.

2:10AM 6th of June 1944 - East of Picauville
Plane #80 (307th Airborne Engineer Platoon and 4 men from Kilo Company HQ)
Plane #80 flew straight through the FLAK storm above Picauville.  Luckily no one in a plane was hit as the shrapnel peppered the plane.  The pilot immediately hit the green light and the men left the plane.

GROUP 307-1 [5+3men]
The four men from Kilo Company in the plane were the four bazooka men from the company HQ: Privates Clarke, O'Connell, DeWitt and Williams.  DeWitt was unlucky to land close to a German billet and was captured.  The other three men soon joined up with members of the 307th.  Clarke landed with a two-piece bazooka.  However, his assistant rocketeer O'Connell, had lost his rockets during the landing, but Williams still had a bag of rockets.  The three men and a small group from the 307th were about 50 yards from the gate to a chateaux.  Possible mission: AMBUSH, a car approaches the chateaux.

2:12AM 6th of June 1944 - West of Pont-du-Chef.
Plane #73 and Plane #74 kept together through the cloud bank and the FLAK, the pilot soon realised he was off course and south of the DZ, but seeing the Moon light glint off the Merderet River to his front and the Douve River to his south he realised he would soon be on the wrong side of the Merderet River.  He hit the green light and both planes dropped their men.

GROUP 1 [12 men]
The company commander had a good jump, but was uncertain where he had landed.  He could see no landmarks.  Soon he found some of his men, and in the next ten minutes he had accumulated a fair sized unit.  His priority was to find where he was.  By 3:00AM he had found 6 men from his plane, including three of the bazooka men, though with only one bazooka.  He also found Lt MacNider, the lieutenant from 1st Platoon and five of 1st Platoon's men.  He thought he heard his bugler a few times, but could only guess from which direction the forlorn bugle blew.

GROUP 2 [14 men]
The company commanders bugler had at first been too afraind to use his bugle, but when 1st Platoon's Tech. Sergeant Cannon found him he was convinced to use it while the sergeant kept guard.  Soon the bugle had drawn several members, including the Company's XO, Lt Hoge.  Within 20 minutes the group had swelled to 14 men.

2:13AM 6th of June 1944 - West of La Fiere causeway.
Plane #82
GROUP 307-2 [unknown]
Eighteen men from the 307th Airborne Engineers left the plane west of Canquigny.  They landed in a wide field and soon formed up.  Off to the east they could see the FLAK rising from positions around St Mere Eglise.  The unit tasked to help Kilo Company blow the bridge over the Douve Rivers knew they were no where near their DZ.

2:20AM 6th of June 1944 - NW of Sainte Mere-Eglise
Plane #77
GROUP 9 [13 men]
The pilot of plane #77 got disoriented in the clouds and veered completely out of sight of the main formation, he soon spotted some other aircraft and followed them and thereby dropped his men on the Dropzone of the 505th Parachute Infantry Regiment instead of the the dropzone of the 508th PIR.  The men of Platoon 2's Squad 2 and the Mortar Platoon landed amongst the well dropped 505 in the open fields NW of Sainte Mere-Eglise.  It took a while but Sergeant Patch soon had found 12 of his Stick's 18 men.  A lieutenant from a 505th found him and ordered him to join him and head to Sainte Mere Eglise.  He had first thought to try find his own company, but when the Lt told him where he had landed he decided it may be best to stick with the 505 until daybreak.  His MG man had located the squads machine-gun, so they headed towards the steeple of the Sainte Mere Eglise church.

2:22AM 6th of June 1944 - SE of Sainte Mere-Eglise
Plane #79
Group 8 [9 men]
The pilot of #79 thought he was still east of the Merderet when in the distance he saw the glitter of Moon light on the sea.  He then ran into heavy FLAK.   He decided he would fly out to sea and then turn around and try find the DZ.  He asked his co-pilot to head back into the plane and ask the jump master if he wanted to try that or return to England.  Just about then the starboard engine exploded into flame and shrapnel peppered the plane.  Private Daniel Noce fell forward with a grievous back wound.  The pilot realised the plane would not make it and immediately hit the green light, the paras did not need a second invitation and all but one (and Noce) escaped the burning craft before it crashed in a ball of flame to the east.  The crew went down with their plane.

The stick landed amongst enemy troops and some were killed, wounded or captured while trying to escape their 'chutes. The rest escaped into the nearby orchard and fields.  Sergeant Collins was soon able to get some of his men together, he could hear German machine-gun fire, and decided he needed to rescue the fallen men, ordering his few comrades to use grenades and knives he led them towards the sound of the guns.

2:24AM 6th of June 1944 - Blosville
Plane #75
Group 3 [6 men]
Group 4 [2 men]
The pilot of #75 changed direction a few times trying to find landmarks, eventually he made out the sea to the east of Cotentin Peninsula, he could see the FLAK, probably aimed at the 101st aircraft, he decided he would not find the DZ, and had likely missed it, so he hit the green light switch.  The men of 1st Platoon's 2nd Squad and Mortar squad exited into a nightmare.

The stick landed amongst trees and the enemy, and onto buildings in Blosville.  Unarmed paratroopers were shot down while trying to escape their 'chutes.  The men ran to cover, escaping into the nearby fields, and slowly but surely found each other.  The Mortar Sergeant found his gunner, but no one else, they found a ditch and hid.  Sergeant Trudeau managed to find five of his men, they knocked on the backdoor of a house, he told them they were near Blosville.  He told them that "German paratroopers had billeted in the town earlier in the evening".

SUMMARY
Kilo Company had truly been spread miles from their Dropzone.  Their story was no different to the rest of the 508th Regiment.  The 507th landed in a fairly compact area, but to the east of their DZ, and most landed in the flooded fields around the Merderet River, many drowning or losing their equipment to escape drowning.  The 505th however landed smack on their DZ (mostly).  The expected objectives of D-Day were looking to be more difficult to obtain than first envisaged.

Kilo company had lost several killed, had a few injuries and lost a few men as POWs.

Each number represent one stick (plane load) of paratroopers, with GREEN for the 508, Blue for the 507 and Orange for the 505.  

The objectives of the 82nd Airborne, secure bridge, destroy bridges, create a blocking front, and wait for the forces from UTAH BEACH and throw back any German attempt at attack.

The Map showing the areas:

The Unit Roster (U/C=Under Command, N/UC=Not Under Command, the number is the group number)


Excuse any missing W's, my keyboard has been killed by First Person Shooters :)

Sunday, 4 December 2016

Force on Force WW2 modifications

Further rules for the Force on Force WW2 campaign.  This is a work in progress with many points for discussion amongst the group.  Also includes stats for the units involved (all up for discussion).

DISCUSSION OUTCOMES IN RED

See the earlier post for details on the campaign: https://bigfof.blogspot.com.au/2016/11/the-company.html

All distances are doubled at 28mm, so 6” = 12”

Though vehicles will generally be rare in our games they will appear.  Specific rules for these vehicles adds interesting aspects to the game.

Vehicle Smoke Dischargers
A target vehicle equipped with Smoke dischargers may attempt to pop smoke.  Smoke is only effective for attacks originating in the front arc of the vehicles turret (exception: Panther VG, Tiger VIE and King Tiger, which have directional Smoke Mortars, so can drop smoke in any direction).  Before the Reaction Test is made the reacting player declares his vehicle will attempt to Pop Smoke.  Make a TQ, on a 4+ the vehicle has popped effective smoke.  If the reacting player wins the reaction test then the vehicle will benefit from the Smoke during Round of Fire.  If the player rolls a 1 on the TQ the tank has depleted its smoke.

A vehicle smoke screen blocks LOS until the end of the turn.  Place a 6” smoke screen 6” from the vehicle in its turrets front arc.

The following tanks have Smoke Dischargers
German: PzKpfw III, PzKpfw IV(1), PzKpfw V(1), PzKpfw VI(1), StuG IIIG(1), StuH42
British: Cromwell(2), Churchill(2), Tetrarch(3)
US: M4A1(4), M4(105)(2), M4A2(L)(5), M4A1(76)(5)

1: From July 1944 the Pzkpfw IV, V, VI and the StuG IIIG have a +1drm on the Smoke Discharger TQ.  StuG stopped having Smoke Dischargers quite early, so these may have a very small chance of being present.
2: M4(105), Churchill and Cromwell have a +1drm on Smoke Discharger TQ
3: Tetrarch has a -1drm on Smoke Discharger TQ
4: M4A1 has a -2drm on Smoke Discharger TQ
5: From July 1944 the M4A2 and M4A1(76) has a +1 on Smoke Discharger TQ

Smoke Ammunition
A tank may fire a Smoke round on a TQ.  The following tanks carry Smoke rounds:
               German: PzKpfw IV, StuG IIIG, StuHIV, Marder I, Marder II
               US: All Sherman, M8 Scott HMC, M7 Priest HMC, M10 TD*
                              *M10 TD have a -1 on Smoke TQ.
               British: Cromwell IV, Churchill IV, Bishop
A smoke round creates a 4” smoke screen that blocks LOS.  It lasts until the beginning of the placing players next turn.

White Phosphorus Ordnance shells
The Cromwell IV, M8 HMC, M7 HMC and all Sherman’s may use WP on a TQ.

White Phosphorus ordnance shells create a 4” (6” for 105mm) wide LOS blocking smoke screen.  The smoke dissipates at the start of the placing players next turn. 

WP vs. vehicles are counted as WP1, the target only receives one armour dice in defense.  All other modifiers are as normal.  If a WP ordnance successfully hits the vehicle the Smoke screen will “stick” to the target on a D6 4+.  The target vehicle has a +2 Defense and a -2 Attack modifier.  The vehicle must also pass a Morale Check or bail out. 

If the WP round is fired into a building containing infantry the infantry must pass a Morale Check or immediately move out of the building.  If a WP round is fired at a structure containing flammable material or at crops, hedge or trees roll a D6, on a 4+ the area catches fire.  A burning building must be exited at the next opportunity.  When infantry within 3” of a WP hit are attacked with a 3D attack.

WW2 Bailing Out
Crews were more prone to bail out of their tanks in WW2. Therefore any damage result on a tank, other than “Suppressed”, the crew must roll a Bail Out TQ.  If the crew fails the test it bails out.  This makes vehicles less dominating in our games.

The crew on its next activation may roll a Morale Check to remount vehicle.

An alternative rule which includes the option to pull back:

Vehicle suffers a hit and any result other than “Suppressed”, apply normal result and then roll a TQ
 PASS: No further effect
 FAIL: If the vehicle is mobile perform Pullback, if unable or would rather not, roll a second TQ: 
  PASS: No further effect
  FAIL: Bail Out

Which do you prefer?  And should we make vehicles also check for bail out on any damage result, including Suppressed?

EDIT 6/12/16: We discussed and decided we would use the "Pullback OR Bail Out" option.  Need to decide now if this happens on any successful hit or just on non-Suppression results?
EDIT 10/12/16: Any vehicle with Low Confidence or Confident will Pull back OR Bail Out on any hit.

Offboard Support Units
Due to the very small size of the battle area in 28mm (or 15mm depending on the mission) games a player may choose for snipers, Forward Observers, Vehicles, Guns, Medium Support and Heavy Support to be setup offboard.  Offboard units cannot be targeted while moving.  Offboard units may not enter the playing area but may move along the edge.  Offboard units need LOS and need to successfully pass a Spotting TQ each time they attempt to target onboard units (and vice versa for onboard units vs. offboard units).  Offboard units can be setup in Overwatch.

Each time an offboard unit moves it may roll a D6 to find out how high many inches high the units location is relative to the board edge, leave the D6 in place as a reminder, when checking LOS measure from a location above the edge equivalent to the height.

A mission may modify the maximum height of an offboard unit.  The map location in the campaign also modifies offboard units.  Dense Bocage and major towns have a -1drm on Spotting TQ.

Preparatory Bombardment
Due to the close in nature of Force on Force artillery is of minimal use.  Single artillery pieces may support an attack from offboard (like a single offboard tank, AT gun, howitzer).  Due to the small area and short time there is no realistic way to call in artillery.  But, the Preparatory Bombardment is still a good option.  If the attacker has artillery available (from the campaign map) they can pepper the area before entering.  Rules to come.

Interdiction Artillery
The defender may call on artillery to interdict and incoming attack.  If the mission includes artillery support the defender may interdict a number of units as they are about to enter the playing area.  Rules to come.

Preparatory Smoke Screen
In the area where the campaign was fought smoke screens were used, but generally seem to be late or poorly implemented.  We can add this as an attackers option, with only a small chance of success.  Rules to come.

Flanking
The attack may attempt to flank the enemy position and attack from one of the flanks.  We had rules for this in the Malikastan campaign, so may reinvigorate those.

German Counter-attack
One aspect of German forces in WW2 was its near clockwork reaction to enemy gains, the immediate counter-attack.  How do we play this?  Keep it to the campaign map, or give the German player a counter-attack reserve.  I think this will add to the game.  So, maybe a quick barrage followed by a last minute counter-attack adding two turns to the game (if time permits?)?

EDIT 6/12/16: We discussed and decided we would use a card system.  So say the German player is losing on the second to last turn, he can pull two cards from the Counter-Attack deck.  These will have some unit or support, for example, a squad, a vehicle or offboard support.  The player has two turns to benefit from the reinforcement.

The rule may be, on the 3rd to last turn the German player can randomly select one reinforcement card OR on the 2nd to last turn draw 2 cards OR on the last turn draw 3 cards.

WW2 Small Arms
An important rule to remember in WW2 games is the OUTGUNNED rule on page 43 of the FOF rulebook.  This rule covers self-loading rifles, auto-rifles and bolt-action rifles.  Though, I think the British SMLE probably outguns the KAR 98K, what do you think?  Check the many Youtube videos on the SMLE Mad Minute …

Alternatively, studies showed that only 15-20% fired at the enemy in WW2.  Maybe 1 dice per THREE? 

The definitions on Force on Force page 37 and 38 imply:
Light Support: M1918BAR, BREN, Rifle Grenades, MG38 magazine
Medium Support: MG42, M1919A4, MG38 belt, British 51mm Mortar*
Heavy Support: MG42 tripod, M2 HMG, German and US/German light mortars

The British 51mm Mortar can use direct fire.
The British PIAT can fire from within buildings.

Hollow-charge weapons may be used against targets in buildings and vehicles:
Light Support: Anti-tank Rifle Grenade
Medium Support: Panzerfaust
Heavy Support: PIAT, Bazooka and Panzerschreck

General squads
The following is the general division of squads.  An interesting difference between the Allieds and the Germans is the positioning of the squad leader.  In the British Sections and US Squads the squad leader is in the maneuver or assault team.  The German’s have the squad leader in the Fire base team.  I wonder if we should try simulate this effect?  Maybe giving a +1 on the Reaction Checks for Squad Leaders?

The US Paratroopers squad is divided into two teams:
[Squad Leader + 6 Rifleman + 1 RifleGrenadier]
[Assistant Squad Leader + M1918BAR/M1919A4+ + 2 Assistants/Rifleman]

The Germans generally:
[Squad Leader + 1 MG42/MG38 + 2 Assistants/Rifleman]
[Assistant Squad Leader + 2-3 Rifleman + 1 Rifle Grenadier +1 Rifle/PanzerFaust]

British:
[Squad Leader + 5 Rifleman]
[Assistant Squad Leader + 1 BREN + 2 Assistants/Rifleman]

EDIT 6/12/16: We decided to go with the new rule that all Squad Leaders impart a +1 Reaction DRM to any reaction.  This will allow us to simulate that the Allied squad leader was in the maneuver or assault team compared to the German gruppe leader who is in the fire support team.

Campaign Progression – Squad Improvement
After each battle select one squad and roll an improvement 2D6:
2: Squad Morale permanently shifted up one
3: Troop Quality permanently shifted up one
4: Initiative permanently shifted up one
5: Unit gains bonus, D6
               1: +1D on all attacks vs. vehicles
               2: +1 on all Spotting Tests
               3: +1D on all Defense Rolls
               4: +1D on Close Combat Attack Rolls
               5: +1 on all Reaction rolls
               6: Designate one soldier as a marksman.
6-12 Nothing

Each squad may have only one improved skill, if a new one is rolled replace the last one.

THE UNITS IN PLAY

US Parachute Infantry Regiment & other parachute units of the 82nd Airborne
INITIATIVE D10
TROOP QUALITY D8
MORALE D10

US Glider Infantry Regiment (325th GIR)
INITIATIVE D8
TROOP QUALITY D8
MORALE D10
The glider troops are regular infantry.  Regular infantry have a initiative of 8.

746th Tank Battalion
Equipped with M4A1 Sherman’s (and M5A1? And M8 Greyhound?)
INITIATIVE D8
TROOP QUALITY D8
MORALE D8

889th Tank Destroyer Battalion
Equipped with M10s, experienced (Tunisia and Italy).  Landed on D-Day, by D+1 some of the tank destroyers reached Chef-du-Pont passing through Forges.  They had liaison personnel in arrive on D-Day with the 82nd glider landing.  Any M10’s in the mission will originate from this unit.
INITIATIVE D10?
TROOP QUALITY D8
MORALE D10

The 91. Luftlande-Infanterie-Division
INITIATIVE D8
TROOP QUALITY D8
MORALE D8 or D10
The German 91st Airlanding Infantry Division was stationed in the centre of the Cotentin Peninsula.  The division was formed as an air transportable infantry division in January 1944.  The division had no combat experience but was fairly well trained.  The commander of the division was killed a few hours after the 82nd Airborne landed.  The decapitation of the division resulted in a few hours of indecision that greatly benefited the US Airborne in obtaining their objectives.  In the campaign we will keep the commander alive, giving the division a quicker reaction time, therefore you will likely see the counter-attack occurring a few hours earlier than it did occur. The D8 morale?  I am in two minds about this, they died in their droves attacking, maybe D10.

241 and 709 Infanterie Division
These to “stationary” divisions added armour to the 91 Luftlande Division attack on St Mere Eglise on June 7th.  These two divisions are second rate, too old, too young, the lame and POW convinced to fight for the Nazi (instead of dying of starvation).
INITIATIVE D6
TROOP QUALITY D8
MORALE D8

The armour seconded to the 91st Luftlande were vehicles from the 241ID which had StuG IIIG (Panzerjaeger Abteilung 243) and the 709 ID which had Marder I and Marder IIIM (Panzerjaeger Abteilung 709)
INITIATIVE D8
TROOP QUALITY D8
MORALE D8

OST TRUPPEN in Georgians (Ost Battalion 975 and 797) and Russians (Ost Battalion 653)
INITIATIVE D6
TROOP QUALITY D8 (drops to D6 at 50% strength remaining OR Platoon Leader SW/KIA)
MORALE D8 (drops to D6 at 50% strength remaining OR Platoon Leader SW/KIA)
Rule for consideration: Maximum of one activation per turn.
These Russian and Georgian ex-POW troops appear to have initially put up a fair fight and then suddenly capitulated.  The units had German leaders, but due to communication and the will of units the initiative is dropped to D6.

Therefore, I have given them TQ8 and MOR8, though this permanently suffers a die-shift when they get to half-strength or their platoon leader is seriously wounded or dies.  The Ost Truppen are holding ground around St Mere-Eglise and south and east of St Mere-Eglise.


Fallschirmjäger-Regiment 6 (6th Fallschirmjaeger Regiment)
INITIATIVE D10
TROOP QUALITY D8
MORALE D10
A well trained parachute regiment with a core cadre of combat experienced NCOs.  The 6th FJ was attached to the 91st Luftlande Division.  We could drop the Initiative to D8.  Why?  Partly due to circumstance, the regiment performed poorly on the attack, though that seems to mainly be to the regimental commander himself, poor communications, lack of ammunition and poor reaction due to the disruption by the scattered US paratroops. Once linked to the 17th SS Division they did put up a hard fight. But, maybe this was due to the SS arresting and threatening to shoot the FJ commander.  One battalion was lost early, it is difficult to figure out why this battalion “vanished”.  Maybe they were in range of the ships.  We may change reality a bit with more of the FJ meeting up with the 82nd Airborne. So, instead of holding the Carentan Front with all three battalions one may move around to the N and W and attack across the Merderet River (why? Well, I have the minis J ).


Panzer-Ersatz-und-Ausbildungs-Abteilung 100 (and possibly 206)
INITIATIVE D8
TROOP QUALITY D6 (D8)
MORALE D8
The 100th Tank Replacement and Training Battalion consisted of an HQ and three companies.  The battalion was equipped with French Hotchkiss 38 (8), French Somua S35, x1 French B1-bis (flame), French Renault R35, French Renault FT17s (!) and Panzer Mk III.  On D-Day only 50% of the units tanks were “runners”.  I presume many of these were made to run as many were destroyed by the advancing US forces to the south.  A mission may add a special rule on reliability, like, roll a D12 each turn on a 4+ activate the vehicle suffers engine failure or something like that.

The unit was under command of the 91st Luftlande Infanterie Division.  As a training unit I have given then a TQ of D6 and any leader vehicle (PzkW III) is D8.  The Battalion included four infantry platoons with one light machine gun per squad.  The 206 seem to mainly have been used to make “tank” noises to cause uncertainty amongst the US.  The German commander thought this worked as it caused a pause in the US attack on Montebourg.

Maquis (French Resistance)
IRREGULAR
INITIATIVE D6
TROOP QUALITY D6 to D8
MORALE D8

Though the French Resistance played little part in the Cotentin campaign (as far as I am aware). We may play some behind the lines interdiction missions.

Sunday, 13 November 2016

NEW CAMPAIGN: The Company - A WW2 Force on Force campaign


With the present rise of nationalism, isolationism and appeasement it is looking like we should return to the halcyon days of the last time these policies ruled the roost: June 1944.  So we are leaving the dust of Malikastan and the streets of Grand Brexitia and heading to the fields of Normandy.


"The Company" campaign will follow K Company of the 508 Parachute Infantry Battalion 82nd Airborne Division through the Normandy Campaign.  Kilo Company is led by Captain McNair, born in Minnesota.

Each man in the company will have a name and will be on a roster.  The campaign will start with the miss-drop of the 82nd Airborne into Normandy, and will then follow the men as they group up and eventually fight as a unit.  The campaign will probably stop when we get bored or the 17th SS Division is pushed back.

The campaign will be both played in 15mm (Brisbane) and 28mm (Bunbury) using the Force on Force rules.  We are also thinking of using the Pulp Alley rules for some of the initial games where paratroopers are trying to group up and find weapons, and stay alive.

The Roster

The roster is an Excel worksheet that contains each man's name, if he is a sharpshooter or not, is he KIA, WIA, MIA, Under Commander (UC) or Not Under Commander (N/UC).  The players will not know the condition of men who go MIA/KIA/WIA away from the unit, they will merely remain N/UC.  N/UC men who are alive and hale will have a hidden dice which marks the probability they will join up with one of the companies cores.

A portion of the company roster (Excel worksheet)


The 1944 Normandy US Airborne Platoon OOB that will be used for Force on Force.
As Force on Force has not yet produced a WW2 supplement we have designed the vehicles using AP penetration at 100m and the armor of the various vehicles.  Here is a sub-list containing the vehicles that will be used in the campaign (no King Tigers or Tigers :( ).
The vehicles and guns for the campaign.  No special ammo given.  We may add other rules in time.


[WARNING: The boring rules commences here!  This is a Work in Progress and will be edited over time until we begin play]

The Drop

These are the rules to simulate a disrupted drop that portions of the 82nd Airborne experienced on D-Day.  Only the game master need know these rules, but they are presented here in case you are interested.  The Company is divided between eight C-47 Skytrain's.  The planes begin in groups of three.  A disruption dice is then rolled for each group of planes, the three groups are: [123] [456] [789*]

* Plane 9 contains a platoon from the 307th Airborne Engineer Battalion.  These men may land in similar areas to Kilo Company and join up.

Disruption D12:
1-2 [123]
3-4 [1][23]
5-6 [12][3]
7-8 [13][2]
9-12 [1][2][3]
The proposed campaign we are playing is for a bad drop, but we can decide to make it a better drop, by modifying the above dice type used to either a D8 or D10 instead of a D12.

Each group of planes is then given a drop accuracy probability, this denotes how close to the planes designated dropzone the plane starts to drop it's men.  The dropzone is a 2-digit number using a D6-D6, so 1-1, 2-3, 4-5, 6-6 etc.  The drop locations are indicated on the map.  The 1-1 is the actual dropzone of this particular company, west of Gueutteville and NE of Château de Bernaville (the HQ of the German 91st Luftlande Division).
The dropzone of the regiment - Not many of the regiment landed on or even close to this dropzone.
FLAK 2D6
There is a small chance each plane will be hit by FLAK.  Roll a 2D6 for each plane, on a result of 1 or 2 the plane is hit.  Planes with a dropzone starting with a 6-X (i.e. within one space of St. Mere Eglise) have a -1DRM. The plane may still drop paratroopers, roll a 3D6 to see how many men survive and exit the plane before it crashes.

Drop Accuracy D6.   The drop accuracy is how far from the designated dropzone the plane drops its men.  This is the first digit in the two digit location.   The die is modified as follows: a group of 2 planes gets -1drm and a group of 3 planes gets -2drm, +2drm if hit by FLAK.  The logic behind this is that if the planes remain in their V formation they have more eyes to find the correct DZ.

A modified result of below 1 is counted as a 1.

Drop Precision D6.  This is the second digit of the drop location, for example the Drop Accuracy rolled for a plane is 5, now roll the Drop Precision, say a 3 is rolled, this plane therefore drops its men in location 5-3.

A small area of the map.  The map is an area movement style map overlaid on the May 1944 BIGOT map of the area.  The map includes all the German positions that air reconnaissance identified.  I may make a VASSAL module for the campaign, will make it easier in the beginning, but once the company has formed up it will be less needed.  Though...if we played more than one company...

Smooth Exit D10

Each plane gets a Smooth Exit D10 (this is automatically rolled in Excel).  This represents how scattered the plane drops its men in the drop location.  A low number means the man has a low probability of finding his company.  This number denotes the Grouping Up dice for each man.

Roll D10:
1 Very Slow Exit - drop is spread out each man gets a Grouping Up dice of D6
2-3 Slow Exit - drop is somewhat spread out, roll a D6 for each man: 4+ the men get a Grouping Up D8, otherwise they are assigned a Grouping Up D6
4-6 Below Average Exit - roll a D6, on a 1-2 D6, 3-4 D8, 5-6 D10
7-9 Average Exit - roll a D6, on a 1 D6, 2-3 D8, 4-5 D10, 6 D12
10 Perfect Exit - roll a D6 for each man: 1 D8, 2-3 D10, 4-6 D12

The Excel worksheet does all this and is hidden from the players.

Grouping Up D6/D8/D10/D12
After all the planes have dropped their men then each man is assigned a dice, a Grouping Up D6, D8, D10 or D12 (see above(.  The players will not know which dice is assigned to each man.  This dice roll is automatically assigned in the Excel worksheet and is hidden from the players.  Each turn the dice is rolled for each man until he joins a CORE unit of the company, if successful the man finds one of his companies core (becomes Under Command), if not he is considered Not Under Command until the next turn.   If he rolls a 1 he has either been killed, captured or seriously wounded.  Again, players will not know this.  If the roll is successful then he finds the nearest group from his company.  He will automatically move to his own platoon when he is in the area of the platoon or is equally close to it.  The target for grouping up changes per turn.  For example, on turn 1 the target to group up is 7+, on turn 2 it is 6+ until it reaches 4+.

Finding his way Dice results, a 1 he is killed/captured/wounded, on a 2 his assigned dice drops one level (example D10 to D8), if he drops below D6 he is lost.  On a result of 3 his assigned Group Up dice shifts up one level to a maximum of D12 for the next turn.


The CORES
Each Captain, Lieutenant and Company/Platoon Sergeant is a CORE, on landing they will be marked on the map.  They will slowly grow with men as the men successfully roll to become Under Command.  The players can move their Cores towards their mission objectives by any route.  If a Lieutenant is killed is subordinate becomes the new CORE.

Turns
The length of a turn changes through the campaign.  The dice roll score required to group up also becomes easier over time, starting at 7+ and reducing to 4+.
June 6 0200-0300 Grouping Up 7+
June 6 0300-0500 Grouping Up 7+
June 6 0500-0700 Grouping Up 7+
June 6 0700-0900 Grouping Up 6+
June 6 0900-1200 Grouping Up 6+
June 6 1200-1600 Grouping Up 6+
June 6 1600-2400 Grouping Up 5+
June 7 AM Grouping Up 5+
June 7 PM Grouping Up 4+
June 8 AM Grouping Up 4+
June 8 PM Grouping Up 4+
June 9 AM Grouping Up 4+
June 9 PM Grouping Up 4+
June 10 AM Grouping Up 4+
June 10 PM Grouping Up 4+
June 11 Grouping Up 4+
June 12 Grouping Up 4+
etc..

At interesting points we will stop and play missions.  There may be more than one mission per turn, depending on our dispersed the Company is at that time.

Other units.
The Company is not alone in D-Day, so other units will appear on the map, other than protecting flanks or giving support or allowing supplies to arrive they have no influence on the company.  Though other units may fight and soften up enemy before an attack for example.

Some units will join the company, like AT Guns (Glider) or tanks and armored cars.  This will occur as these units make contact.

The Enemy
The enemy will move as well.  We may get a player to move them (maybe the game master), and therefore they will not necessarily appear where they did historically.  The enemy must make approach marches, which can be interdicted etc.

Ammunition
A critical factor on both sides, at least for the Americans in the early part of the invasion, is ammunition.  Often attacks halted on lack of ammunition, and often ground had to be given up due to the lack of ammunition.  The enemy ammunition condition will be hidden from the players.

A units available ammunition is scaled from 2  to 12, the level of ammunition corresponds to the Force on Force ammunition supply as follows:
2-3 Untenable Ammunition - Cannot fight due to low ammunition, unit will retreat to adjacent area if clear of enemy or surrender if not.  If the area contains a supplied unit it may remain in the area.
4-5 Low Ammunition, -1D
6-8 Normal Ammunition, -
9-12 High Ammunition, +1D
At the end of each turn in which a unit shared a location with an enemy, or artillery adjacent to an area containing friends and foe the unit loses D3-1 ammunition.

All German Units start the campaign at Level 7.  US Paratroopers start with 1D6+2 (3 to 8)

Resupply Routes

  • US Paratrooper Units can scrounge for ammunition, during the Campaign Maintenance Phase roll the troop quality D8, on a 4+ the unit finds 1 Ammunition.  During the Combat phase a unit not involved in combat can Scrounge a second time.
  • US Units with a Line of Communication to the Utah Beach Exit locations may roll a D3.  Paratroopers with LOC to a Glider Landing Zone (Les Forges) from 0700 on D-Day may use this Supply route instead of Utah Beach Exits.
  • German Units with a Line of Communication to the Grey Exit Locations may roll a D2.
  • A Line of Communication is defined as a contiguous set of location not crossing a red-dashed boundary that is clear of enemy units.


German Units


Well, enough for now...time for Battlefield 1 :)

I will update this post as the rules are written.