Showing posts with label ODA. Show all posts

Monday, 27 January 2014

The Death of War, Debt and Spear-Shaker (Force on Force AAR)

“Incoming!” Shouted the Uruguayan lieutenant as 107mm rockets roared in from Azmakassar.
 
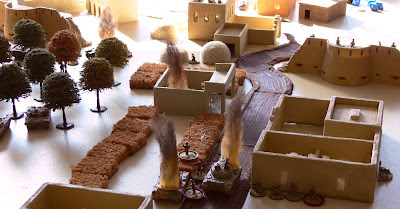
The terrain.
The farmland and hamlets to the east of FOB Breakbone have been witness to dozens of battles between the UN and the insurgents, and after the Hotakistani’s invaded the British fought several battles holding and eventually pushing back the invaders.  Now, all that stands between the massive Hotakistani invasion force and the UN Engineers repairing the critically important airfield to the south is a Uruguayan infantry company, a British Armoured squadron and a British Mechanised Infantry company.

Following the early British successes the British fought forward to deny the Azmakassar Ford to the Hotakistanis, and thus cut-off the supply route to the southern Hotakistani invading column.  This move, however, proved untenable due to a long open northern flank.  The British soon realized that the reinforced Hotakistani’s would encircle and destroy them, so they began to withdraw.  The Hotakistani’s determined not to allow their prey to escape sent in three infantry companies supported by numerous insurgents.
 
This battle (3) follows the battle "Washing Day in Azmakassar" (2) as the British continue their advance to the rear.
The British fought through the first encirclement (see AAR Washing Day in Azmakassar http://bigfof.blogspot.com.au/2013/11/washing-day-in-azmakassar-aar.html).  Now the British convoy must breakthrough the final encirclement, held open by fatigued Uruguayans and a US ODA team (see briefing at http://bigfof.blogspot.com.au/2014/01/the-ride-of-debt-war-battle-shaker-wand.html ).
To the east the British artillery commander watched the rockets slamming into the Uruguayans, he looked at his radioman who shook his head, still no call for retaliatory fire.  The battle had begun.
The convoy and the six Valkyries
The Mission Summary:  The Uruguayans start setup on the board with the convoy, the convoy then attempts to exit as Hotakistani and UN reinforcements arrive.  Points are not given for the convoy units, but instead become multipliers, so for example if four vehicles remain on board at the end then the Hotakistanis multiply their VP by 1.5

Each side received four reinforcement cards, the UN failed to get two of them and ended up with Fortification of three buildings and the Hotakistanis received a 2S19 Mtsa 152mm SPG and a Quad 14.5mm AA gun.  The Hotakistanis faced a difficult challenge, they had received no armour in support, nor Tank-hunters.  So the best AT they had were their six RPGs with AT1(M) or on a TQ4+ AT2(M).

The Battle begins: The initial bombardment hit the Uruguayans heavily, pinning a large portion of the force.  This allowed the Hotakistani infantry to move up and bring effective fire to bear from above their UN positions on the road.
Hotakistani infantry appear above the Uruguayans near the exit.
Meanwhile, further to the east, the convoys led by the Challenger tanks Battle and War surveyed the hills to the north.  But, on a roof of a close-by two storey building appeared a fire team of Hotakistanis with an RPG.  The RPG hit Spear-Shaker, a Warrior, and damaged its main gun.  As the gun was out of ammo it meant little to the crew and they sprayed the building with their co-axial machine-gun.  This Hotakistani team was to spend half of its time helping wounded comrades for the remainder of the engagement.
An overzealous Mtsa...arrives...and burns (the 2S19 Mtsa from QRF)
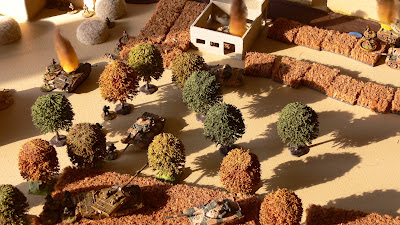
Then, through an orchard to the east appeared an overzealous self-propelled Howitzer, a Russian-built 152mm Mtsa.  The Challenger crew was too slow in their traverse and the huge HE shell exploded close-by damaging the main gun, it still, however fire and the Mtsa burst into flame.
End of Turn 2.  In the lower right you can spot the Hotakistani platoon commander, he was only able to bring in two 107mm rocket barrages in the whole engagement, and one of those did as much damage to his own men as the enemy.
Turn 2 to 7 (The UN won initiative from the Hotakistanis in Turn 2, and then miraculously lost it to the Hotakistanis for turn 3 to 7!): 
The ODA arrive and attack the Hotakistani ambushers.
The artillery woes for the Hotakistani started early and hardly gave up.  Their radios worked...most of the time.  Their artillery crews?  The laziest bunch of lazy bastards on Planet Artillery (They had a fatigue of 2+, so rolling a D8 I needed anything but a 1, on turn 2: rolled a 1, turn 3: rolled a 1 and on turn 4: rolled a 1!).  The Hotakistani commander had many thoughts of  "going commissar" and head back into Azmakassar and shoot some artillery men.

The firefight near the exit had begun to get very hot, the Hotakistani's had snatched one of the fortified buildings and the Uruguayans were not allowing this to continue.  However, both sides gave and received (This battle was too have the highest KIA and WIA out of all the games we have played with regular vs. regular).
The fierce firefight at the Uruguayans defenses.
The second ODA team arrived and moved to bolster the Uruguayans against the increasing Hotakistani attacks.

At the other end of the engagement the Hotakistani's pushed a Quad 14.5mm AA gun down the road to engage the soft-skin vehicles, but the ammo-less Challenger blocked the road.  The AA gun, however blasted the rear of the Warrior "Spear-Shaker", but to no effect.
The Quad fires at the Warrior.
The Hotakistani's then started to suffer at the east end, the Uruguayans had recovered from the initial attacks, and with the ODA now in support they brought heavy fire to bear and pushed one of the Hotakistani units out of their position.
The Hotakistanis attempting to close the road take very heavy fire and start to break.
The Warrior IFV "Spear-Shaker" continued to take fire, and wounded one of the Hotakistani gunners in response.  Four Hotakistani fire teams now tried to take out the Land Rover Snatch and WMIK.  They poured in fire, ventilating the two vehicles, but the Snatch started it miraculous life.  The WMIK was not as lucky and was destroyed.
A WMIK dies.
Around about now a British SAS team arrived to assist (REACTION CARD), they moved into the three storey building and helped to inflict casualties on the Hotaksitanis attempting to close the road.  But, just after they moved into the building the building caught fire (CARD), the SAS and Uruguayans ran for their lives from the conflagration giving the Hotakistani's a much needed respite.
A fire erupts destroying the three storey building (much laughter from said Hotakistani player and grumbling from the UN :)
Finally, after much swearing, the Hotakistani lieutenant finally made contact with his artillery and the barrage was fired.  Unfortunately, the 107mm rockets landed on both the Hotakistanis and the UN forces.  The Hotakistani fortified building collapsed injuring many, a rocket landed next to both the SAS team and the ODA team causing several casualties.
Hotakistani 107mm land indiscriminately among both sides, destroying the Hotakistani fortified building.
The Barrage from down the road.
The ODA CCT teams started to rain 81mm mortar and 105mm howitzer shells on the Hotakistani HQ and eastern attack force, but with little effect.  Later on the combined mortars and artillery would put an end to all idea of the Hotakistanis advancing down onto the road and blocking the exit.

And then it happened.  That which cannot be penetrated was penetrated (I pulled a Golden BB card at the perfect moment!).
A measly RPG (2D and M) hits the Challenger on the bridge and the Challenger explodes (played Golden BB card!).  Laughter!  Bill asked for a burning Abrams, he gets a burning Challenger.
An RPG strikes the Challenger and miraculously finds a weak spot causing the tank to explode.  Even better, the tank was on the bridge, so the following convoy would now need to go back to the ford to cross the canal and escape eastward.

On the road to the west an RPG hit the lead Warrior causing the crew and passengers to bail out.  The second Warrior moved in to give them cover.  Meanwhile, a group of five Hotakistani's tried to swarm the debussed British soldiers but were all shot down.  All five Hotakistani were killed.

The ODA team in the south (top of the photo below) overran the downed Hotakistanis in the fallow field and captured three of them (a very useful 9VP).
The struggle around the bailed Warrior (at the top you can see the ODA overruning the downed Hotaksitani.
The debussed squad and crew mounted their Warrior, but the Warrior was hit again and immobilised, the crew and squad abandoned the vehicle and escaped on foot.  Unfortunately, the Warrior which had given them cover was hit and destroyed.  This was the end of the engagement.  The Uruguayans now fell back as a rearguard as the half the British convoy escaped.  The Hotakistani's managed to overrun and capture one of the ODA CCT team members, I am sure they will milk this POW for maximum propaganda benefit.
The Warrior "Debt" burns
Result: Half the convoy was destroyed or delayed, so VP counted 1 for 1.  In the end the Hotakistani's suffered 68VP and the UN suffered 36VP.  So a victory for the UN.  The numerous serious wounds and POWs resulted in a high VP game.  An enjoyable game, artillery though ineffective most of the time played a critical role in turning the tide in local struggles.  The Hotakistani's drew some beautiful cards, Burning Building, Golden BB and Offboard Sniper Team (the Sniper team was able to neutralise one of the ODA teams).  A surprising number of dead and seriously wounded in this game.

A fun game.

This was a big game, basically four infantry platoons and ten vehicles.  Though we took 9 hours to play (with a BBQ, thank you Shane) the Force on Force rules worked well.

We have added a new Bog rule.  If a vehicle using tactical movement bogs it may expend 4" to try to unbog.  If it fails and still has remaining movement it can attempt a second unbog.

Friday, 24 January 2014

Mission Briefing: The Ride of Debt, War, Battle, Shaker, Wand-wielder and Spear-shaker

Mission Briefing: The Ride of Debt, War, Battle, Shaker, Wand-wielder and Spear-shaker (v2)

Well, Ride of the Valkyries was already used ... here be the mission for this weekend.  As usual it could be as balanced as a two-legged dog...but when you are riding with the six Valkyrie babes, who cares.

To the east the British armour and mechanized infantry at the Azmakassar Ford have escaped being overrun by Malikastani’s and insurgents.  They are now heading at speed towards Patrol Base 55, around the south of Azmakassar.  The Hotakistani commander infuriated that the British slipped past the useless Malikastanis has sent two infantry platoons to block the retreating convoys path.  From the FOB, a Uruguayan UN platoon, bolstered by artillery and a US ODA team, rushes eastward to keep open the fast closing trap.

The Challenger tanks Debt and War each lead a convoy of Warriors and soft-skinned support vehicles (the Warrior’s are named Battle, Shaker, Wand-wielder and Spear-shaker.

The mission starts with the Uruguayan infantry infiltrating into the house each side of the Azmakassar road and the convoys heading westward.  The first convoy decided it would be safer to go the slower route across the fields, while the second convoy decided the safer route would be across the bridge and down the main road.
The Map v2 (added a ford between the bridges, 2' from the western edge, this should allow a little more flexibility in the mission.

The Legend...well just Legend really

Convoy 1: Setup on road and must use the road as first route option.  Convoy consists of a Challenger, Warriors x2, Soft-skin x1, Squad x2.
Convoy 2: Setup off the road and must use the fields as its first route option.  Convoy consists of a Challenger, Warriors x1, Soft-skin x2, Squad x1.
Convoy Rules: Convoy vehicles main guns are out of ammo, their MGs are still at full strength.  Convoy vehicles may only move as a convoy (except when scattered) and will react to fire.  Even if a vehicle reacts to fire it may still move as a convoy.  Vehicles still have smoke.  When a Medium or Heavy vehicle in the convoy is destroyed/immobilised in a fireball the convoy makes a TQ, if it fails the convoy scatters, each vehicle moves D6” from its present direction in a random direction.  In the next convoy move the vehicles must first regroup and then use remaining movement to continue moving.  A convoy only moves when each unit is within 2” of each other (front to rear).  Once a convoy loses a vehicle it may break from its predesignated path by passing a TQ.
Reinforcements: Both sides draw 4 reinforcements cards from a double set of reinforcements cards.  So in the end it will be 43 reinforcements, assigning a D8, D10, D12 and D20.  All reinforcements must enter from offboard by passing a TQ 4+.  UN reinforcements may enter on the Exit, Entry or SF entries.  Hotakistanis enter using the normal dice method for this mission.

Turns: 10+1(D6 4+)
Initiative: Hotakistani for turn 1, roll for initiative from turn 2.  Convoy vehicles do not count towards initiative dice.  Convoy moves at the end of the turn, no matter the initiative order.

Units:
Uruguayans (use full US Platoon) TQ8/MOR8/INI8 Fatigue 5+ (one squad must pass TQ to enter)
ODA (two 6 man teams, with JTAC) TQ10/MOR10/INI12 Fatigue 4+ (each team only enters on passing TQ)
Support: UN Medium Artillery Battery 1+
Support: UN Light Artillery Battery Fatigue 1+

Hotakistani Infantry Platoon 1 TQ8/MOR8/INI6 Fatigue 2+ (one squad must pass TQ to enter)
Hotakistani Infantry Platoon 2 TQ8/MOR8/INI6 Fatigue 2+ (each squad must pass TQ to enter, and enter from Turn 2)
Support: Medium Rocket Battery 1 2+
Support: Medium Rocket Battery 2 3+
 
The organization of the Hotakistanis (sans M113)
Turn 0: Uruguayans/ ½ reinforcement’s setup in their zone (blue area).  Roll Fatigue on one squad, a failed TQ results in that squad being delayed and enters on road on a TQ from Turn 2 onwards.
Turn 1: First Hotakistani platoon and reinforcements arrive using a D8 to find the location for each squad/vehicle.  On a D6 4+ the UN player can select the colour (green or red), otherwise the Hotakistani players decides.  Roll Fatigue on one squad, that squad is delayed until the following turn and only enters on a TQ.  Hotakistani forces may choose to delay entry until Turn 4 (see Turn 4) and then use a D10 to roll entry.  Hotakistani's enter within 6" of the location point, and must be more than 4" from a UN unit.  If they cannot enter they reroll, the UN does not control the colour on the reroll.
Turn 2: SF arrive at two possible locations (roll fatigue or be delayed on one fire team).  2nd Hotakistani Platoon arrive using a D6 to find the location. Hotakistanis may choose to delay until Turn 4.  Roll Fatigue on one squad, that squad is delayed until the following turn and only enters on a TQ.
Turn 4: Delayed Hotakistanis may use a D10 to find entry and ignore colour rule.

VP: Casualties count as normal.  Convoy vehicles and crew are not considered towards VP, but are multipliers to the VP.  For each convoy vehicle and convoy infantry squad exited gives a multiplier to the UN.  For each convoy vehicle destroyed/immobilized or remaining on board at the end of Turn 10 give the Hotakistanis a VP multiplier (there is a total of 11 convoy units):
               Two Convoy Units: x1.25
               Four Convoy Units: x1.5
               Six Convoy Units: x1.75
               Eight Convoy Units: x2

Tuesday, 12 November 2013

SMAFU (Mission)

Situation Malikastan AFU

After a long break we are back to the Malikastan campaign.  So a little sideshow which will also introduce the Russians to the campaign.  In an earlier mission (http://bigfof.blogspot.com.au/2013/07/aar-they-are-like-zombies.html ) the Russian ambassador was captured by the insurgents.  This mission will see the Russians arriving in the chaos which is Malika City to rescue the ambassador.  Players, review and send in any comments.  The game will see the debut of my Eureka Miniature Russians and Colonel D. Zaster's QRF BMP-3s.  This could be as balanced as a two-legged dog, but the narrative is what counts :)

Briefing
The leaking of General Phil Graves “off the record” comment: “I will flatten Malika City” has handed the insurgents in Malika City a propaganda gold mine.  Outrage has swept through the Malika City streets with the insurgents fanning the flames: the new AUSAF force will flatten the Azure Mosque.  In response the western prisoners in the insurgents hands have been herded into a park behind the mosque.  They have been locked in a stockade and a film has been spread across the cellphone network.  The footage shows that the Russian ambassador has been placed inside or near to the mosque itself.

In response, the Russians have moved.  Early in the morning the UN and AUSAF forces at the Malika Airport were woken by a low flying MiG fighter, the “bomb” was several thousand leaflets.

“Refrain from alarm, the vozdushno-desantnye voyska will shortly be landing at your airfield.  They will secure the hangars at the eastern edge.  We come in peace.  Do not interfere.  Interference will result in mortal danger.”

Ten minutes later a low flying Antonov dropped 300 paratroopers in an airdrop.  Several minutes later four large Antonov’s landed on the main runway and taxi’ed to the hangars.  One of the large aircraft veered off the damaged runway and burnt, another was damaged and would never fly again.  The UN commander at the airfield, still unsure of the new command structure failed to contact either General Phil Graves or Colonel D. Zaster.  He decided that he was not about to start WW3 and decided to leave the Russians alone.

The Russians unloaded several mechanised vehicles and a helicopter gunship.  They assembled and a company left the airfield heading to Malika City.  The UN base commander decided it was a good time to have a whiskey.  Though this turned into a vodka when a Russian VDV Captain arrived with a salutary bottle of vodka.  After a hug and kiss they became best of enemies.

The Russian convoy headed towards Malika City from the SW, driving in past the massive ruined fort complex to the south of Malika City.  They then headed towards the Azure Mosque.

Sitting on the 4th floor of the ransacked Grand Vacation Tavern Hotel across the road from the Azure Mosque is a US special forces A-team.  The team is in Malika City to neutralize a HVT who attends the Azure Mosque.

Mission:
Russian VDV platoon (mech.): Rescue the ambassador, his family and staff.  Failure to rescue the ambassador is a defeat.  The ambassador is either in the mosque or in the stockade to the rear of the mosque. Casualties or lost vehicles are of no importance, the Russian President has said the ambassador will be rescued and he will be rescued.  The VDV gain 5VP for the ambassador and wife, and 1VP for other staff.  The Russians must either move the ambassador and staff of the south edge (roads) or fly them out with the HIND.
US ODA A-TEAM: Neutralize the insurgent leadership.  Victory points are gained for each insurgent leader neutralized (1VP), and 5VP for each HVT (even if the Russians do the dirty deed on the HVT).  The Russian ambassador has been disguised as an insurgent leader…
Insurgents: The insurgents gain VP for each enemy killed (2VP) or captured (4VP).

Time: 8 turns

Forces:
Russian VDV & Spetnatz (INI8/TQ10/MOR10) and (INI10/TQ10/MOR10)
The Russian player has a full mechanized Russian VDV platoon (mounted on BMP-3 or other), have a Nona (120mm) and a HIND on call.  The HIND contains a Spetnatz team of four.  The HIND will fast-rope the Spetnatz onto the Azure Mosque Roof on a D8 on a TQ 4+ (try from Turn 1).  If the helicopter is damaged it will land the team on a random building roof.

US ODA A-TEAM, a full 12-man team (INI10/TQ10/MOR10)
The team setups hidden on the 4th floor of the hotel.  They have access to the heavy artillery.  They have two AT-3.

Insurgents
The insurgents start with four regular insurgent guard teams (INI6/TQ8/MOR12) onboard
1xLdr AK, 1xAK, 1xRPK, 1xRPG (AP2/AT2M)
And one sniper team
1xSpotter, 1xSniper (INI6/TQ10/MOR8)

Each time an ODA or VDV/Spetnatz team engages with automatic rifle fire roll a D6, on a 5+ a team of insurgents will arrive at the start of the next turn.  Each reinforcement is randomly selected from Primary or Secondary reinforcements.

Reinforcing insurgents are on a D6
1-2 Regular INI6/TQ8/MOR10
4-6 Irregular INI6/TQ6/MOR12

From turn 4 onwards roll a D6 4+, if successful the insurgents receive a T-55 (INI6/TQ8/MOR8)

Mobs
Each time an AP3 or AT3 weapon is used within 6” or fired at a target with 6” of the Mosque roll a D6, on a 5+ a mob of 10+D10 will arrive.  Mobs will attack all combatants within 12” of the mosque once they become violent.  They become violent on seeing an attack from or at a target within 6” of the mosque.  Mobs are game controlled, and will attack the target or firer, whoever is closest to the mosque.

Mission Special Rules:
Where is the ambassador, he is either in the stockade or mosque, one arriving at one of the other the VDV/Spetnatz roll a TQ, on a success roll a D6, on a 4+ the find the ambassador, if he fails to be at one location he is automatically at the other location.
Who is the ambassador, the ambassador is dressed as an insurgent leader.  If the ODA Sniper team has LOS to the ambassador at any time they roll a TQ, on a failure they will try shoot him.
Ivan Ivanovich?  The stockade and mosque each contain 6+D6 prisoners, each group contains 3 Russians, a successful TQ is required to obtain each of the Russians.
Who is a suicide bomber, at both locations the insurgents have planted an insurgent suicide bomber, AP5/AT1.  The bomber can be spotted by the VDV/Spetnatz on a successful TQ when activated, otherwise the bomber will explode on a TQ6 4+ without allowing an interruption.
HIND.  The HIND can be called in to attack or pick up the ambassador.  The three locations where the HIND can be landed are marked on the map.
Confusion.  Each time the ODA attack in LOS of the Russians the Russians will attempt to interrupt on a successful TQ.
HVT.  The HVT is in one of the guard teams, the insurgent player records which team he is in.  Each insurgent team which arrives may have a HVT on a D6 roll of 1.  The HVT will upgrade the TQ by +1DShift.
SMAFU - Situation Malikastan – AFU.  The streets of Malika City are full of traffic, like the mobs vehicles are moving.  If the insurgent player rolls a VBIED one of the cars in the city becomes the VBIED, randomly and secretly selected, all vehicles on the road (not parked) are moved.  A VBIED is difficult to spot and requires a successful TQ with a -1DShift.


Sunday, 14 July 2013

AAR - They are like zombies!

The hordes of insurgents surged through the now undefended legation district, like zombies they ran past an ODA group and a Malikastani platoon which were in the process of searching for civilians.  The ODA were also attempting to retrieve the body of their commander, while the Malikastani's were intent on rescuing their president.  The Russian consulate officer also needed rescuing.  It would prove a hard set of objectives.

Mission outline here: http://bigfof.blogspot.com.au/2013/07/mission-they-are-like-zombies.html

The reinforcement cards for the two forces:
UN1 ODA Team (so a 3rd team)
UN2 Convoy of three Light APC (VAB)

Hotakistani1 Squad of paratroopers
Hotakistani2 Flamethrower
The Field of Battle
Two groups of insurgents had passed the forward ODA and Malikastani positions before the sentries had realised that they were insurgents.

The celebrating voices of the advancing insurgents was interrupted by an insurgent rocket barrage.  Rockets crashed into the buildings and streets, collapsing roofs and throwing shrapnel across the streets.

It did not take long for the ODA and Malikastanis to recover, and both Haqiqa units were brought under fire, one destroyed in the chicane outside the Russian consular building, the other badly mauled in the street in front of the MOFUC building.
The opening dispositions


The opening salvo of insurgent rockets and the opening engagements
While the Malikastani commander and his radiomen repaired the two HUMVEES, his one squad finished off the insurgents in the road before the Russian consulate.  The ODA in the tall building fired down into the insurgents in front of the MOFUC building, causing a few injuries.  The Malikastani's in the blockhouse moved forward to save their president, but took fire and lost one man wounded before getting into the building and making contact with the president.

The ODA searched a floor in their building and found no civilians, all in all not many non-Malika civilians were left in the area.  Just then a convoy of French VAB's (manned by Malikastanis) arrived to rescue the president.  A squad of Hotakistani paratroopers hearing the gunfire also arrived, armed with a flame-thrower.
The paratroopers made haste towards the ODA building and fired their flamethrower, the ODA survived without injury, but they quickly fell back escaping the smouldering building.  A suicide bomber chased after the special force operators, he surprised the ODA team and  blew himself up...but it was more fizzle than bang (1,1,1,2!).  In the field north of the garage complex insurgents began to form and were shot down by the 2nd ODA team.  This field would contain scores of dead insurgents by the end of the day.
Out of the flame-thrower into the exploding insurgent
The convoy of VABs moved to the front of the MOFUC building.  They engaged the paratroopers with their HMGs, and were supported by the arrival of a third team of ODA at the roadblock.  The flame-thrower soon covered the first VAB with fire, but it survived.
The paratroopers take on the convoy and the ODA
The two HUMVEES also advanced, ready to pick up any civilians discovered by the ODA or Malikastani teams.  An insurgent technical now arrived in the open ground north of the garage.  This vehicle was to live a miraculous life, the ODA poured fire into the truck, but did nothing (turn after turn after bloody turn!).  By the end of the battle the swiss-cheese truck drove off on its rims, but it still drove.
The new terrain pieces: Marsh and wire fence.
A squad of Malikastani's moved to the top storey of the building overlooking the open lot and fired, giving and receiving.  

The ODA in the garage discovered two groups of civilians and called the Malikastani commander in his HUMVEE to come and extricate the civilians.

It was about now that insurgents broke into the rear of the MOFUC building, but were wiped out by the Malikastani soldiers protecting the President.

Meanwhile, the Malikastani President and his four bodyguards made a dash for the waiting VAB, they closed the doors just as flame enveloped the vehicle from the paratroopers flame-thrower.  The VAB survived.  But they were not safe, yet.  A two-man RPG team appeared from around the corner and fired, but failed to penetrate, then a mob of insurgents with Molotovs clambered onto the vehicle, but to no avail.
Insurgents clamber over the presidents VAB, while the gunner on the 2nd VAB is wounded.
The newly arrived ODA team and the VAB guns threw back the paratrooper RPG team with three casualties.

Two Malikastani soldiers now entered the Russian consulate and the Russians and Malikastani's headed to safety while the ODA and 3rd Malikastani squad covered them.
Russians head for safety.
Just as they ran a Frogfoot flew in and let loose a salvo of rockets, the rockets exploded down the street, wounding a Russian consular officer, a Malikastani overwatch soldier and a member of the ODA at the HESCO roadblock.
Rockets explode down the street
Just when things were looking good ... disaster struck, the VAB with the president rev'ed.  The supporting VAB cleaned the insurgents off the presidents vehicle, then the presidents VAB sped off.  An insurgent inside the MOFUC building fired a RPG which struck and destroyed the VAB.  The crew, bodyguards and president leapt from the burning VAB only to be struck by the paratroopers flame-thrower and a second RPG.  The whole Malikastani group went down and would remain in the street for a long time.
The president caught between two RPGs and a flame-thrower
Around the corner, near the golden Holden, insurgents were now moving through the parked cars, they engaged the HUMVEE manned by the radio operator, and were in turn engaged by the ODA who had entered the building.  Then the Russians tried to move but were brought under fire.
Insurgents fire on the Russians but then fall to the ODA from the building above them.
The civilians in the garage loaded into the HUMVEE and speed off, dodging any insurgent fire.  With the road through the back of the tall buildings blocked by the now burning HUMVEE the driver decides to drive across the marsh.  Just then a large bomb lands on the Russian consulate and is destroyed, showering all close by units with shrapnel.
The HUMVEE struggles through the marsh, while the Russian consulate vanishes in a bomb blast
The last two VABs are destroyed just as the insurgents are reinforced by a T-55.  The T-55 is soon hit by a Malikastani RPG, doing light damage, but the crew bailed.
VABs destroyed by RPG while a T-55 arrives, only to be hit and bailed.
Insurgents in the square tall building are engaged by the ODA, while insurgents march on the presidents body.

The ODA team in the southern tall building get ready to bring in artillery danger close as a last desperate [but UN player decides to clear out the HUMVEE first, and allow the civilians to escape...a bad mistake!].  The escaping HUMVEE is also ambushed and destroyed, in the process the UN loses contact to the artillery [card draw on Reaction roll of 1].

The ODA exchange fire with insurgents across the alleyway.  While Russian special forces arrive at the bunker.
THE END.  Insurgents descend on the president's body, he is found to be dead, but one of his bodyguards is found alive and captured.  And then disaster, a group of insurgents break into the tall ODA building, the ODA fire at the onslaught only wounding one enemy.  And then it is bayonet work.  The ODA fail completely, unable to even wound or kill a single insurgent, all but one ODA team member is killed, the last surviving ODA team member becomes a prisoner.
President down - HUMVEE down and ODA down - in one turn the turns have tided

[In three foul swoops the insurgents go from behind in points to way ahead, victory is beyond the UNs grasp.]

Insurgents: 39VP
UN: 16VP

Comments: Hmm, well the enemy does get a vote!  The ODA with MOR8 suffered, but the insurgents were patient and nasty and were willing to sacrifice.  What went wrong for the UN?  One major problem was not being able to give mutual support between units.

An interesting game, the moving hotspots proved a good idea.

The wire-mesh fences make an interesting terrain type, they give no cover but restrict movement. 

Friday, 22 March 2013

Mission Briefing - To catch a Mad Bomber

Mission Brief - To Catch a Mad Bomber

An informer has told the UN that the Mad Bomber is having a meeting at the NGO offices of Malikastani Organization For Unity Creation.  The UN has mounted a special forces operation to capture/kill the HVT and rescue hostages that he reportedly is using as human shields.

We decided to make this mission more organized and therefore a full briefing.  On the day the mission victor is who holds the HVT or if he is alive or dead.  For the campaign the VP also count.
View centred on the NGO Malikastani Organization For Unity Creation Building - Where the HVT The Mad Bomber is believed to be spending the night
Operation: Capture of the Mad Bomber.  The Mad Bomber was captured in a UN raid earlier in the year and imprisoned in the main jail in Malika City.  When the Hotakistani invaded Malikastan dozens of sleeper cells erupted across the city.  One of the cells let off a truck bomb at the jail and allowed all the inmates to escape, including the Mad Bomber.  The Mad Bomber has now taken command of some of the cells.  The US has sent in an ODA team to recapture the Bomber.    Major Clare has assisted by sending in her unit of the Australian SASR.  The US also will have a predator drone above the city, unfortunately it only has a single Hellfire.

The ODA team has infiltrated the northern edge of the Legation district and are ready to attack the target building.  Informers indicate the target is located in the NGO “Malikastan Organization For Unity Creation” (MOFUC).  The SASR are driving four vehicles towards the target location to exfiltrate the HVT.

MAIN MAP

ODA enter from position V or VI

ROUTE MAPS

The SASR choose to enter on MAP a or MAP b.  Then move through one of the maps A, B, C, D, E or F to reach the main map.  Where they enter on the main map depends on which route they have selected.
The 8 route maps.  When you enter a map you roll a D8, and enter with 6" of one of the red arrows.  You exit through the blue arrow areas (within 6") and enter the next map at the point designated on the MAP.  The D8 exit arrives at a random point on the Main Map.

Victory Conditions

UN Victory Conditions:
Primary UN Mission: Capture (15VP) or Kill (10VP) (with body retrieval) the HVT known as the Mad Bomber
Secondary UN Mission: Per rescued western hostages 1VP/hostage
Tertiary UN Mission: Kill unit commanders to disrupt chain of command (1VP per leader)
All teams exit the south of the main map: +5VP
All teams exit the south of the main map in transport: +5VP

Hotakistani Conditions:
Mad Bomber Survives Mission & on map: 12VP
Mad Bomber Survives free and off map: 6VP
Mad Bomber Killed and left on map: 3VP
Per Western Hostages not rescued: 1VP
Per SASR/ODA Killed: 1VP
Per SASR/ODA (not driver) Captured: 5VP
Per Vehicle captured or destroyed: 1VP

UN Forces

Main Map Mission Units, enter from III or IV
ODA (full 12 man ODA, INI12/TQ10/MOR12) [TQ12 when breaching]

ODA Special Rules:
1) Stealthy
2) Suppressed Weapons
3) NVG
4) Smoke Grenades
5) Battle Armour +1
6) Advanced Medical
7) JTAC
8) Breaching experts, with on breaching man were team, move and breach.
9) ODA capture enemy after close combat on a 1 or 2 on a D6

SASR Convoy
SASR (INI10/TQ10/MOR10)
Fire team 1 (4): x1 M4, 1x M4+UGL, 1x SAW, 1x Marksman w/AT-4
Fire team 2 (4): x1 M4, 1x M4+UGL, 1x SAW, 1x Marksman w/AT-4

US Army Drivers: x4 w/M4 (INI8/TQ8/MOR10) NVG
MRAP (0.5) - [Crew 1+10+(6extra)]
Humvee (AGL) - [Crew 1+4+(3extra)]
Humvee (0.5) - [Crew 1+4+(3extra)]
Humvee (TOW2) - [Crew 1+4+(3extra)]

SASR Special Rules:
1) Stealthy
2) NVG
3) Advanced Medical
4) Battle Armour +1
5) Smoke grenades
6) One AT-4 per team
7) Vehicles roll D10 INI while SASR are within vehicles, otherwise D8
8) SASR team starts on MAP [A] or [B] by rolling a D8 and finding the entry point.  They then choose an area to move off the map.  The units then enter on a single location on the maps [a]-[f], they then exit the second map onto the main map.

Hotakistani Forces

Main Map
Hotakistani Insurgents (INI6/TQ8/MOR12 Regs) (MOR drops to D6 if Mad Bomber killed or captured)
Units in the NGO Building are specified under the special rule section.

Setup on map prior to start:
Roll three D6 and place a guard patrol at each rolled location (green on map).  On a 6 the insurgent player can select the spot.  Patrol is setup in the street closest to the point.  Roll a D6 to select the patrol type:
[1-2] 2 w/AK, 1 w/RPK, 1 w/RPG (Medium AP2/AT1 Md)
[3-4] Leader w/AK, 2 w/AK, 1 w/RPK
[5] 3 w/AK, 1 w/RPG (Medium AP2/AT1 Md)
[6] 4 w/AK

Main Map Reinforcements
At the beginning of each turn roll for reinforcements and roll a D8 and then roll a hotspot D8:
[1] D4 w/AK
[2] Leader w/AK, 2 w/RPK, 2 w/AK
[3] Leader w/AK, D6 w/AK
[4] Leader w/AK, 1-2 w/RPG
[5] Weapon Team (2) w/PKM
[6] Mob 2D6 w/AK
[7] Technical w/PKM
[8] Technical w/70mm RCL

Route Map Insurgent Reinforcements
One reinforcement per turn per map at a Hotspot.  Roll D6 and then roll Hotspot.  Reinforcement are (INI6/TQ8/MOR10 Reg) unless otherwise noted.
[1] 2 w/AK, 1 w/RPK, 1 w/RPG (AP2/AT1 Med)
[2] Leader w/AK, 1 w/AK, 1w/RPK, 1 w/RPG (AP2/AT1 Med)
[3] 3+D6 w/AK
[4] Technical w/PKM (AP2)
[5] Untrained mob 2D6 w/AK (INI6/TQ6/MOR8 Irregular)
[6] 1 w/PKM, 2 w/AK
As a UN moves onto a new 1foot square part of the route boards roll a random event D6:
[1-3] Nothing
[4] Civilian Mob in road, insurgent places within 9” of convoy
[5] Insurgent player may place good roadblock within 6” of convoy
[6] Insurgent player may move poor roadblock within 6” of convoy

Special Rules

1) Saint Mad Bomber.  The insurgent player may either reroll the type of reinforcement on the Main map or the Hotspot dice roll each turn.
2) Predator Drone.  The UN has one predator drone armed with a single Hellfire missile.  At the beginning of each turn the UN players must decide the board that will receive the drone.  Only the ODA or SASR may direct the predator to fire.  Predator will remain to observe.  No out of sight movement on map where predator is observing.
3) Roadblocks:

  • Mob – A mob of civilians in the road, must use tactical movement to traverse, may use rapid but lose 1VP.
  • Poor Roadblock, first vehicle to encounter must pass TQ to break through the roadblock.
  • Good Roadblock, vehicles stop moving, and in next turn must pass TQ to break roadblock, more than one vehicle may attempt to move through.

4) UN has initiative for the first 8 turns, then roll normally.
5) Hotakistani Insurgents count as regulars except they must roll a TQ to activate if they have no leader.  This is to demonstrate the confusion at night, that only some leaders are able to overcome the issue.
6) Environment. The mission is at night with a half moon.
7) Insurgent movement rule.  If insurgent have not spotted special forces they move towards the sound of gunfire or the engine noise of a Rapid moving vehicle.  They will use rapid movement towards the firing units and will move until enemy is in LOS.  Priority is given to the closest gunfire, then distant gunfire, and if there is no gunfire any rapid moving vehicle.  If noise then move in a random direction, units moving off the map are lost.  If gunfire is heard from the NGO building make a TQ for the unit that is activated, it will move towards the NGO building if it passes the check instead of the closest gunfire.
8) Jittery.  Insurgent patrols will move around randomly (direction by D6”), also, roll a TQ, on a 1 the unit fires at an imaginary target.
9) MRAP may carry 6 more than capacity and the HUMVEEs 3 more than capacity, but suffer a -1DShift on Casualty Checks
10)  The Hotspots on the Route Maps are placed by the Insurgent player, they may be placed anywhere, so long as they are separated by at least 8".
11) Terrain.  All building afford 2D protection.  Qalats are 3D8 strength and concrete buildings are 6D8.  All ditches requires a TQ to pass or bog.  Large canals or rivers require two TQ to cross.  Ploughed fields must be crossed at Tactical Speed or Rapid Movement with a TQ, if failed the vehicles immediately stop (but do not bog, they merely lost control).

DO NOT READ PAST HERE IF YOU ARE A PLAYER

12) There are 8 rooms in the NGO target building.  No unit may move in the building until they hear small arms fire, then they must pass a TQ to move.  Each room has a chance of containing the following.  All units in the build are resting until the first breaching explosive or non-suppressed gunfire.  On entering each room roll a D8:
  1. Mad Bomber w/AK + 4 w/AK (INI8/TQ8/MOR12 Reg w/Body Arm+1) OR Nothing if already found
  2. Mad Bomber w/AK + 4 w/AK (INI8/TQ8/MOR12 Reg w/Body Arm+1) OR Nothing if already found
  3. D10 Western Hostage, 1-2 guards w/AK, 0-1 Suicide Bombers (AP-4 Explosive Vest)
  4. D8 Western Hostage, 1-2 guards w/AK, 0-1 Suicide Bombers (AP-D6 Explosive Vest)
  5. Empty
  6. Empty
  7. D8 w/AK (INI8/TQ8/MOR12)
  8. Arms Dealer.  A Russian arms dealer is in the building talking to the Mad Bomber.  He has a team of four men with him.  If he is captured the UN player receives +5VP.  The Russians are all armed with SMG (INI8/TQ8/MOR10, NVG, Body Armour +1) OR Nothing if already found.
Following the first audible gunfire within 6" of the NGO building the insurgent player can start to activate rooms.  The player selects a room that has not yet been activated and rolls a dice.  From then on the occupants of the room may activate on a successful TQ.

Colour images of the route maps
Colour image of the Main map
Random Cards 1 and 2


Sunday, 9 September 2012

The battle of Rahthkabir

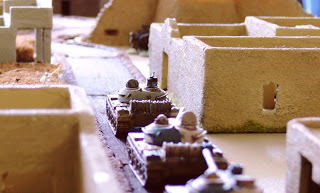
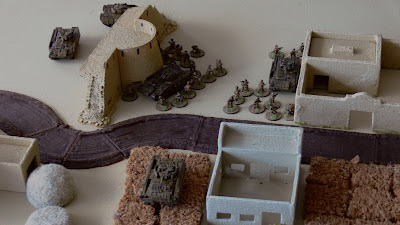
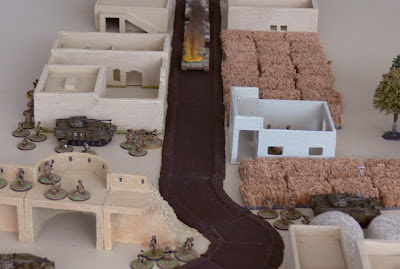
When they came to write the history of the Malikastan War historians looked to the early days and found the battle of Rahthkabir.  Rahthkabir was once a thriving town before the Russian built their base on the ridge to the west.  The markets, schools, workshops and homes were soon rubbled.  Decades later when the ISAF and UNSAF forces occupied a new base on the ridge the town was all but a ghost town.  Once again the town became a favourite spot for insurgents as the MSR ran through the town. Once again the town was pummelled by artillery, air strikes and foot soldiers.  the town was about to host the first armour vs. armour fight in the Malikastan War,

Following the fight around Patrol Base 55 a platoon of Warriors and a transport platoon of trucks arrived to evacuate the survivors, with the burning base to their rear the Warriors headed back to the FOB.  The observers at the FOB soon noticed that several dust clouds were following the retreating Warriors.  When the Warriors stopped to deal with a suspected IED they soon the race was up and now it was time to fight.  Major D. Zaster, acting on information from a special force team in the hills above Azmakassar had ordered his two precious Challenger's out of the FOB to cover the retreat.

In the late afternoon a platoon of T-55's approached the outskirts of Rahthkabir.  The first battle between tanks of UNSAF and Hotakistan was about to play itself out.
A platoon of T-55's (Peter Pig) approach the old 19th Century British Fort wall. In the distance the Hotakistani commander sees a British soldier running for cover.
The Warriors herringboned off the road and the men debussed and began moving to fighting positions.  The British soldiers grabbed AT-4s and LAWs to meet the oncoming tanks.  The news that the Challenger's were on the way.
British soldiers debussing
The lead Hotakistani tank commander shouted for his driver to stop and his Gunner to wake up as British soldiers scampered across the road ahead of the tank.  His gunner scanned for targets, and found one, a lone British soldier firing an AT-4.  Before the Hotakistani could bring his gun to bear the missile smashed into the tank, killing the driver and gunner, the loader and commander escaped the burning wreck to fall injured next to the flaming tank.  The AT-4 had its first kill of the day, and it would not be the last.
An AT-4 fired straight down the road destroys the lead T-55
The infantry cheered, but knew this had still not bought enough time.  They hoped the sounds to the rear were their two Challengers.
The Challenger II's arrive (QRF)
The remaining two T-55's bravely bypassed the stricken lead tank and fired on a Warrior, eventually the Warrior's luck ran out and a 100mm AP shell smashed through the vehicle, bursting into flame.
A Warrior explodes.
Several insurgents arrived, but fell under a hail of bullets as they tried to attack a British team.  A second teams finished off the last surviving insurgent as an AT-4 slammed into the second T-55 which also started to burn.
A second T-55 is set alight with a AT-4, while a British fire team takes on a last surviving insurgent.
The Challenger's and T-72 now joined the fight and soon got into a knife fight in the fields in the forest, firing at each at point blank range.  One T-72 was immobilised, while a second had its main gun shot out.  Meanwhile, another AT-4 destroyed a third T-55.
A knife fight between a Challenger and T-72, surprisingly the Challenger struggled to destroy the T-72, merely blowing a track off with several of its wheels (both models QRF).
The Hotakistani mechanised infantry began to arrive, having debussed a mile or so from the fight.  The third T-55 had tried to find cover in a ruin, only to meet it fate at the rocket red glare of an AT-4.
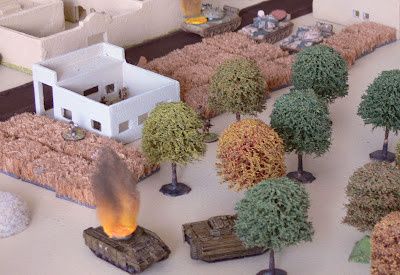
Flames from the last T-55 flicker up over the ruins.
The rescued ODA team from Patrol Base 55 finally got their act together and debussed to give infantry support to the Challenger tanks.  The power of the Challenger's supported by the special force operators proved too much for the Hotakistani's and after a little more desultory fire both sides fell back from the battle.
The scene in the woods, two badly damaged T-72s.  
The first tank battle was over.  The AT-4's combined with the two Challenger's proved too much for the Hotakistanis.  The Hotakistani's fell back to consolidate and wait for reinforcements.  ICOM chatter of the Hotakistani commander in Azmakassar to his leader showed the Hotakistani's thought they had bumped into a "company of British tanks".  He asked for more tanks and air support.

A fair game, we spent too much time chatting, but that was good anyway :)

The Challenger's are mean, but battled to destroy the T-72s outright.  The game gave much for thought and now I think we can design the campaign to mission interface in a better manner.