Showing posts with label 28mm. Show all posts

Friday, 20 July 2018

Chain of Command

After waiting for FOF for WW2 for longer than... WW2? I gave up and started looking at what was on offer.  After reading rules and watching some videos I decided to give Chain of Command a go.  Only problem was finding someone who was keen to play Historical in the domain of fantasy and SF.  I made the mistake of going 28mm, and set about replacing all my terrain.  Time passed.

And then someone showed interest.  We played our first game of CoC.  I was impressed, it gives a good flavour, gives you lots of hard choices, and has lots of support with campaigns, so no fear of powergaming.

Even the patrol phase was tense and fun.  Here are a few pics from our game.  We made lots of mistakes, rule wise and tactically.  Like, I ended up dividing two of my gruppe before I realised the cost.

The Fallschirmjaeger get an order to run as far as possible to the corner, and end up running way to far. 

Germans and US Paratroopers engage amongst the hedges on the east edge of St. Du Mont. 

The elite US pour on the hurt. 

The bocage in the distance becomes a pain, splitting up a squad of Germans and making it difficult to move. 
A very good game was had.

Friday, 16 December 2016

AAR: Americans vs. Russians vs. Germans vs. Americans

The US paratroopers ran towards the hamlet, when they got close they slowed and moved forward gingerly, the 101st on the right side of the road and Sergeant Trudeau's 82nd men on the left hand side.  Sergeant Trudeau had asked the 101st men to flank to the right or find a good overwatch position and give enfilading fire.

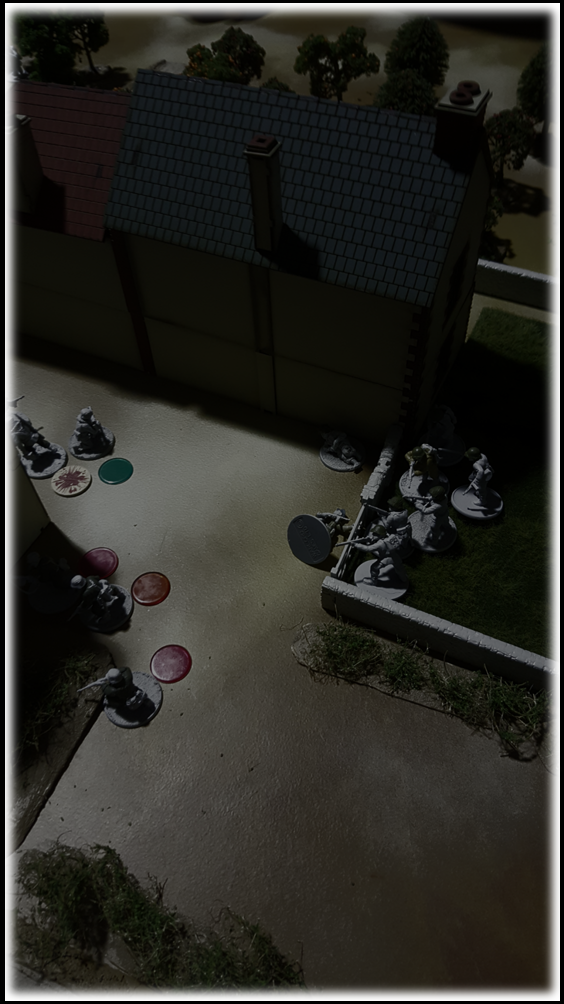
We played the three way mission yesterday (from: https://bigfof.blogspot.com.au/2016/12/mission-briefing-americans-vs-russians.html).  Please excuse the lack of painting, though luckily we played a moonlit
 night mission so not too bad.
The three Russian teams, the unconcious US Paratrooper McBride in the shadow, and the dead Fallschirmjäger sergeant against the low wall.
At the T-junction the Fallschirmjäger sprang into action, they would rescue their fallen commander (and take revenge) and capture the US paratrooper.
The four Fallschirmjäger units at the T-junction and at the bakery.  In the top middle you can see the seven Ost Truppen, and if you have good night eyes you may even be able to see the unconcious McBride.
The German paratrooper team of two and the three man team from down the road moved to gain LOS to the Ost Truppen behind the bakery, their combined fire bowled over the three closest Russians.
German paratroopers firing on the Ost Truppen.  In the distance (top right) the US Paratroopers slowly move forward, happy to let the German paratroopers and Ost Truppen slug it out.
The German team outside the front door of the bakery entered the bakery and moved to the rear door, each pulling out a grenade.  Two grenades went out the door, but, unfortunately for the attackers one grenade was fumbled injuring their own man.  Two Russians went down in the concussions.
Two Russian casualties outside the rear bakery door, and two Germans down on the inside, one self-inflicted wound.
The Russians around the unconscious US paratrooper galvanised into action and charged into the bakery, the last surviving German paratrooper was stunned by the sudden attack and went down in a flurry of rifle butts.

The US paratroopers deemed it what time to strike, they rushed up to the wall and sent a rain of grenades down on the Russians (10 DICE worth!).  The surviving Russians, who were still busy sorting themselves out from the casualties caused by the Germans, fell in the explosions.
The US paratroopers move into the yard and fire at the surviving Russians.  The 101st Airborne move up and pour in enfilading fire.
The US decide it will be easier to just annihilate all the enemy rather than grab the injured paratrooper (the local professional hand model joined us...sigh.)
The US paratroopers seeing the power of their SMG and grenade attacks decided it would be safer to annihilate the enemy than try grab their fallen comrade, they charged in hurling grenades, knocking out the Germans in the ditch across the road.  The 101st Airborne continued to pour fire into the Russians before moving up and spraying the Russians in the bakery.  Eventhough the Russians shouted, "Komeraad! Komeraad!"  The US were no mood to take prisoners, enemies were left to die without aid and some were helped along.

The small teams of German paratroopers melted away in front of the heavy US attack and Sergeant Trudeau was able to give Private McBride the aid he needed, the paratroopers formed a litter and headed back the way they had come.

The next morning Leutnant Merkel awoke.  With his head pounding from his night of "passion" he found Madame Sophie and her girls outside cleaning up the bodies from inside the goat pen.  All his squad lay dead.  And so did at least a squad of German paratroopers.  Madame Sophie was pestering him about her dead goats.  He rubbed his chin, then shrugged, when his head was clear he would need to fabricate an excuse.  He waved at Madame Sophie and trudged back to his camp.  He heard gunfire in the distance.  "Odd," he thought, shrugged and continued on his way.  Until he was shot by a US paratrooper.

Well.  Nasty.  The big US paratrooper team with SMG and optimum bonus (plus grenade bonus) proved extremely nasty vs. the small 3-4 man units.  Basic lesson: Do not get close to these big groups. The US lost no one to injury or death.  So good for the campaign.

Saturday, 10 December 2016

Force on Force WW2 tank stats

Here are the "final" vehicle and gun statistics for Force on Force Western Normandy WW2 vehicles. I have added some of the other tanks more likely to be seen on the eastern flank for comparison (white background).  I decided to not make the vehicle stats compatible with the modern tanks in the Force on Force rulebook so we have a wider range of vehicle armour and weapon penetration.

See other rule modifications here: https://bigfof.blogspot.com.au/2016/12/force-on-force-ww2-modifications.html


There do not seem to have been m/any German half-track Sd.Kfz 250/251 in the Cotentin, I left them in as we probably have the models, and the 17th SS had half-track mounted units.

Vehicle Notes
No Turret -2drm on Reaction Tests out of Front Arc
Slow Turret -1drm on Reaction Tests out of Turret Front Arc
1-Man Turret  -1drm on Reaction Tests and Spot TQ check
Slow Turret + Pivot Turn -1drm on Reaction Tests out of Turret Front Arc, unless tank hull turns as well.  Make a TQ on a 4+ apply no modifier, on a result of 1 the tank is immobilised.  For example the Panther had a slow turret, but it had the ability to Pivot turn.  So, the slow turret can be overcome by moving the hull.  Though, doing a stationary pivot held risk of losing a track or damaging the transmission. 
AP4/AT1L or AP3 or - roll a D6 on a 1-3 No MG, on a 4-5  AP3 on a 6 an AP4/AT1
Confidence Low Confidence and Confident crews must make a Bail Out Check on any anti-tank hit on the vehicle.  The check is made after any base effect.  If the base effect includes a Bail Out check then ignore the extra bail out check.  A crew may only remount its vehicle if the threat that caused the bail out is no longer in LOS of the crew AND the vehicle.
Assault, attacks DA on TQ Infantry armed with Gammon bomb may roll a TQ during an assault and attack the vehicles Deck Armour (or crew if open topped with an AP4) with an AT2L
Wet Stowage +1 die shift on crew survival rolls

Far far in the future in our own galaxy...

... a unit of planetary militia are ordered to clear a nameless ridge 40km's outside of the human settlement of Neuamazonia.

The human reconnaissance units report that the ridge is held by six Donusa chaos warriors.  They report that two of these warriors are searching the destroyed militia vehicles.  The militia commanders orders his last armoured car to flank around the ridge and approach from the north.  He then divides his platoon in three, one squad flanking to the right, one to the left and he commands the third squad straight on in.

The mission briefing: https://bigfof.blogspot.com.au/2016/12/mission-briefing-force-on-force-on-40k.html

Another learning game, before we head into WW2, we played a mission from the Tomorrow's War rulebook, changing the figures to be GW Chaos Warriors and Victoria Miniatures Arcadian infantry supported by the GW armoured car (with Victoria Miniatures wheels).

The game would turn out to be quick and one sided.

The bare ridge before the fight.  Two Chaos warriors amongst the wrecks, two in the middle of the ridge, and the last two over the ridge on the border of the thick forest.
The Left or West Flanking group approach the Chaos Warriors.
This is a fairly hard mission.  Keeping the Power Armoured warriors alive will be difficult.

The militia were cautious in the beginning, moving carefully and firing, only when the Chaos Warriors took their first casualties did they move in.  All six of the would blow themselves up.

Heavy fire is exchanged between the warriors on the hill and the two central militia fireteams.  With Advanced Medication and some lucky rolls their are few casualties.
The armoured car moves up, but the Chaos Warriors are only able to destroy its main gun. With the armoured car and four fire teams the fire proves too much for the 4 chaos warriors.
The militia were able to take advantage of their wounding of the chaos warriors and managed to get men into close contact, surviving the suicidal blasts they managed to ensure no survivors for the next turn.

In the end it was a resounding defeat for the Chaos Warriors.

If we played this mission again I would drop Advanced Medication for the militia, and probably give the Chaos Warriors the ability to assault the vehicles using half strength or something like that.

Still fun.  And Mark Junior continues to ace all the Reaction Checks!  Spooky stuff.

Tuesday, 6 December 2016

Mission Briefing: Force on Force on 40K Ridge

Far far in the future, in a galaxy we inhabit, a unit of Planetary militia are ordered to clear a nameless ridge 40km's outside of the human settlement of Neuamazonia.
The six Chaos survivors
Five days ago a raid of Chaos Warriors hit the Neuamazonia colony, after four days of bitter fighting they were destroyed.  At a huge cost in human lives.  Earlier on this day a final message was received from one of the Neuamazonia milita patrols, they had found the last surviving raiders.  The message was cut-short, and a drone showed a destroyed convoy on the 40KM ridge.

On the ridge are six men of the chaotic Donusa.  Contorted by the chaos of hyperspace these half-men have no hope.  There will be no reinforcements.  There will be no rescue.  They will die.  Their Lord, Donusa, will not come.  But, in their last fight they have the opportunity to take many humans with them.  

Down below the ridge a planetary militia platoon of 24 men and women with their last surviving armoured car have surrounded the ridge.  The battle of 40K Ridge has begun.

This is a 28mm version of Tomorrow's War Scenario 2 on Page 227.  Still painting my 28mm WW2, so we will use some GW miniatures.  See the mission in the book for terrain and the map.

Game Length: Game ends when all Donusa's Chaos Warriors are casualties or prisoners
Initiative: Chaos Warriors for first 2 turns, then test.
Fog of War: Use normal cards.

Don'usa Chaos Warriors
VP: 1pt per turn, after the 1st turn here Chaos Warriors are still combat effective.
Confidence: High
Supply: Normal
Overall Tech Level: 3 (+1D on attacks vs. enemy infantry)
Body Armor: Power Armour TL2 (+3D), can self medicate, double optimum range, intimidating (all attacks by this unit on other infantry are intimidating, make a Morale Check)
INI8/TQ8/MOR10
Special Rule: If they are being captured make a TQ, on success suicide with a 3D Firepoer blast.

GROUP 1:
x2 Chaos Warriors (+1 weapon each)

GROUP 2: 
x2 Chaos Warrior (+1 weapon each)

GROUP3:
x1 Chaos Warrior (+1 weapon each + AP4/AT4(H)) - Can attack with both weapons
x1 Chaos Warrior (+1 weapon each)

Neuamazonia Planeterary Militia
The Neuamazonia Militia
VP:
1VP Per Chaos Warrior Killed/SW
5VP Per Chaos Warrior  Killed/SW before end of Turn 3
3VP If all Chaos Warrior killled/SW before end of Turn 5
3VP per Chaos Warrior POW

Confidence: High
Supply: Normal
Overall Tech Level: 2
Body Armour: TL2 +2D
INI8/TQ8/MOR10

Fireteam 1A (setup within 4" of West Edge)
Fireteam 1B (setup within 4" of West Edge)
Fireteam 2A (setup within 4" of South Edge)
Fireteam 2B (setup within 4" of South Edge)
Fireteam 3A  (setup within 4" of East Edge)
Fireteam 3B (setup within 4" of East Edge)

Each fireteam is:
x2 w\Volley Gun (Gauss)
x1 w\ Plasma Gun (+1)
x1 w\ SAW (+1)

The Neuamazonia Armoured Car
Armoured Car (TL2) (setup within 4" of North Edge)
Weapon TL2 (-1 vs. Chaos Warriors)
Armour TL3
FA 3D10
SA 2D10
RA 2D8
DA 1D6
Main Gun Rotary Laser Gun (AP4/AT2)
Secondary Weapon Gauss LMG (AP4/AT0) (ignore 1 cover or 1 armor dice)
Crew 3
Lifesaver (+1 on Crew Survival Checks)
Improved MG (included)
Safe Haven (+1 on Bail Out Checks)