Showing posts with label US. Show all posts

Friday, 16 December 2016

AAR: Americans vs. Russians vs. Germans vs. Americans

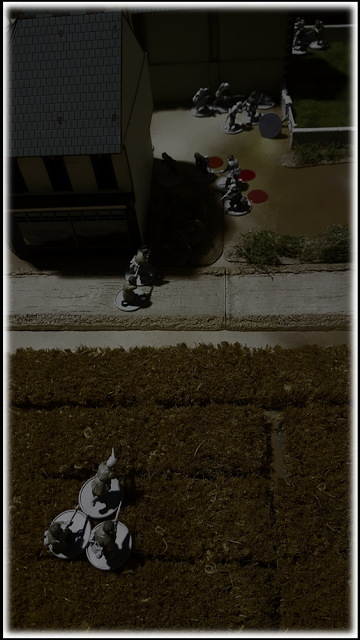
The US paratroopers ran towards the hamlet, when they got close they slowed and moved forward gingerly, the 101st on the right side of the road and Sergeant Trudeau's 82nd men on the left hand side.  Sergeant Trudeau had asked the 101st men to flank to the right or find a good overwatch position and give enfilading fire.

We played the three way mission yesterday (from: https://bigfof.blogspot.com.au/2016/12/mission-briefing-americans-vs-russians.html).  Please excuse the lack of painting, though luckily we played a moonlit
 night mission so not too bad.
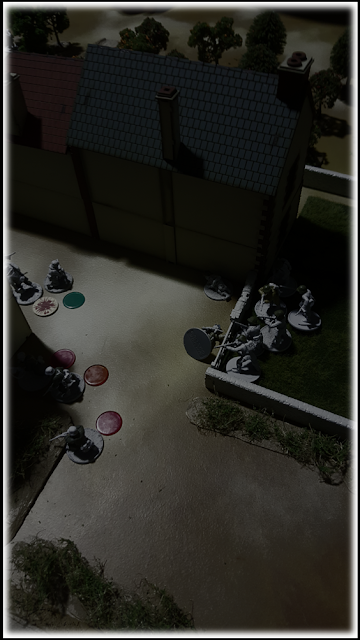
The three Russian teams, the unconcious US Paratrooper McBride in the shadow, and the dead Fallschirmjäger sergeant against the low wall.
At the T-junction the Fallschirmjäger sprang into action, they would rescue their fallen commander (and take revenge) and capture the US paratrooper.
The four Fallschirmjäger units at the T-junction and at the bakery.  In the top middle you can see the seven Ost Truppen, and if you have good night eyes you may even be able to see the unconcious McBride.
The German paratrooper team of two and the three man team from down the road moved to gain LOS to the Ost Truppen behind the bakery, their combined fire bowled over the three closest Russians.
German paratroopers firing on the Ost Truppen.  In the distance (top right) the US Paratroopers slowly move forward, happy to let the German paratroopers and Ost Truppen slug it out.
The German team outside the front door of the bakery entered the bakery and moved to the rear door, each pulling out a grenade.  Two grenades went out the door, but, unfortunately for the attackers one grenade was fumbled injuring their own man.  Two Russians went down in the concussions.
Two Russian casualties outside the rear bakery door, and two Germans down on the inside, one self-inflicted wound.
The Russians around the unconscious US paratrooper galvanised into action and charged into the bakery, the last surviving German paratrooper was stunned by the sudden attack and went down in a flurry of rifle butts.

The US paratroopers deemed it what time to strike, they rushed up to the wall and sent a rain of grenades down on the Russians (10 DICE worth!).  The surviving Russians, who were still busy sorting themselves out from the casualties caused by the Germans, fell in the explosions.
The US paratroopers move into the yard and fire at the surviving Russians.  The 101st Airborne move up and pour in enfilading fire.
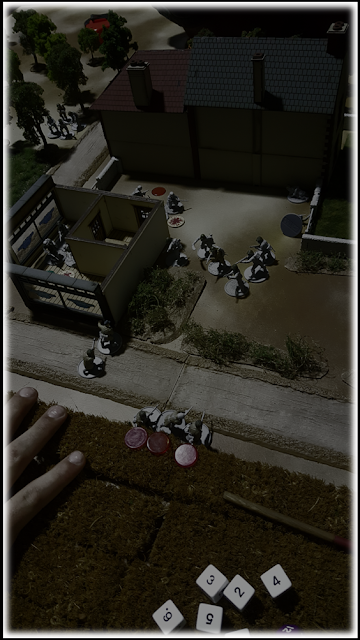
The US decide it will be easier to just annihilate all the enemy rather than grab the injured paratrooper (the local professional hand model joined us...sigh.)
The US paratroopers seeing the power of their SMG and grenade attacks decided it would be safer to annihilate the enemy than try grab their fallen comrade, they charged in hurling grenades, knocking out the Germans in the ditch across the road.  The 101st Airborne continued to pour fire into the Russians before moving up and spraying the Russians in the bakery.  Eventhough the Russians shouted, "Komeraad! Komeraad!"  The US were no mood to take prisoners, enemies were left to die without aid and some were helped along.

The small teams of German paratroopers melted away in front of the heavy US attack and Sergeant Trudeau was able to give Private McBride the aid he needed, the paratroopers formed a litter and headed back the way they had come.

The next morning Leutnant Merkel awoke.  With his head pounding from his night of "passion" he found Madame Sophie and her girls outside cleaning up the bodies from inside the goat pen.  All his squad lay dead.  And so did at least a squad of German paratroopers.  Madame Sophie was pestering him about her dead goats.  He rubbed his chin, then shrugged, when his head was clear he would need to fabricate an excuse.  He waved at Madame Sophie and trudged back to his camp.  He heard gunfire in the distance.  "Odd," he thought, shrugged and continued on his way.  Until he was shot by a US paratrooper.

Well.  Nasty.  The big US paratrooper team with SMG and optimum bonus (plus grenade bonus) proved extremely nasty vs. the small 3-4 man units.  Basic lesson: Do not get close to these big groups. The US lost no one to injury or death.  So good for the campaign.

Tuesday, 13 December 2016

Mission Briefing: Americans vs. Russians vs. Germans vs. Americans

A three way WW2 Force on Force mission in Normandy.  Is it balanced?  I have no clue.
Café Rouge Lumière
Briefing: Leutnant Axel Merkel did what he did most nights.  He followed orders.  His orders were to ensure the Ost Truppen (Russian) he was given were trained in night maneuver.  Merkel was 52 years old, he was proud of saying, "I am like the Fuhrer, I was a Corporal in France in 1918."  Back to his orders. Each night he selected one of the gruppe in his zug and took them on a night patrol to Café Rouge Lumière, Madame Sophie Allemands-pour-l'argent would take the good Leutnant upstairs, after a few bottles of Calvo' he was ready...to sleep.  Downstairs, the lucky gruppe would get to share a bottle of Calvo' with some home brewed Vodka.

By 11pm on the 5th of June Leutnant Merkel was snorning on Madame Sophie's bed and she was sitting on her sofa knitting, by midnight she had fallen asleep and the gruppe of Russians were outside wrestling the goats.

High above the Café, Private Horace McBride was the 4th man out the C-47's door.  He quickly fell the 400 feet, hit the Café's roof, slid off and landed in the yard, startling the goats and the Russian wrestlers.

The Russian's were soon upon the unconscious McBride.  At first they thought it was their Leutnant, but then they saw the parachute.  They decided the best thing to do was shoot the parachutist.

In the small lane outside the Café, Sergeant Joachim Sterballeine saw the parachute slide down the roof and into the garden.  The Sergeant was at the front of the lead element, on bicycles (the Reich's main mode of transportation after most their horses had died in Russia), of the 6th Fallschirmjäger Regiment   He told his men to fan out and went to investigate with one private.  He found a group of "shirtless" Russians gawking and about to shoot the unconscious American.  He ordered them away.  They shot him dead.  The private who was standing next to his now dead sergeant started running and screaming.  All pandemonium broke out.

One hundred yards away Sergeant Trudeau hit the dirt with the report of a single rifle shot.  Then they heard awful screams.  Having seen one of his men hit the roof of the building he feared the worst.  On landing he had quickly found five of his men, and a group of 101st Airborne joined him.  Ordering the men to follow, he ran towards the hamlet.

Leutnant Merkel slept on.
The bakery at the T-junction and in the back Café Rouge Lumière

TURNS:
6
INITIATIVE: US Airborne
CONDITIONS: Moonlit night (pass TQ to fire at enemy beyond double TQ range)
MAP: Small 3x3, three buildings, road, orchard and farmyard
Victory Conditions: Whoever holds the wounded US paratrooper wins at the end of Turn 6.  The wounded paratrooper cannot be killed.

US Airborne
INI D10
TQ D8
MOR D10
Sergeant Trudeau's team, Squad 1, Platoon 1, Kilo Company, 508th P.I.R., 82nd A.I. Division
1 Sergeant w\SMG
4 w\Self-Loading Rifle
1 w\Self-Loading Rifle + Rifle Grenade (+1)

101st Airborne team
1 Corporal w\Self-Loading Rifle
3 w\Self-Loading Rifle

Special Rules: "Loaded With Grenades" (at Optimum range add 2D instead of 1D).  Until fired upon US will not attack enemy beyond optimum range.

Ost Truppen (Russians in German service)
INI D6 (Calvados + Vodka)
TQ D6  (Calvados + Vodka)
MOR D12 (Calvados + Vodka)
Gruppe Team 1
1 w\SMG (Leader)
3 w\Bolt Action Rifle
Gruppe Team 2
1 w\SMG (Leader)
2 w\Bolt Action Rifle
1 w\Bolt Action Rifle & Demolition Charge (8D)
Gruppe Team 3
1 w\SMG (Leader)
1 w\MG38 (+1D)
2 w\Bolt Action Rifle

Special Rules: Demolition Charge 8D with a 4" blast radius.  As punishment Private Ivan Trumfekov has been hauling a DC around on his back.  To make a DC attack pass an Close combat assault, move, drop charge and move as far away as possible (maybe not far enough!)

German patrol, I Battalion, 6th Fallschirmjäger Regiment
INI D8
TQ D8
MOR D8 (seeing their leader die they are uncertain)
Gruppe 1 Team 1
1 Leader w\Self-loading rifle
1 w\Self-loading Rifle

Gruppe 1 Team 2
1 Leader w\SMG
2 w\Self-Loading Rifle

Gruppe 2 Team 1
1 Leader w\SMG
2 w\Self-Loading Rifle

Gruppe 2 Team 2
1 Leader w\SMG
1 w\Self-Loading Rifle
1 w\Self-Loading Rifle + Panzerfaust-30 (Medium AP3, max range 20")

Cards
1 One of your men in this team fumbles a grenade and becomes a casualty
2 Flare, a flare turns the map area to daylight for this turn
3 A plane crashes nearby - Distraction - Gain 2D extra defense in next Round of Fire
4 Good Position - The team gains +1D defense in this position for until it moves
5 Mad Minute - Gain +2D attack in next Round of Fire
6 Leutnant Merkel appears at window and will shoot at random target until dead or game ends.  INI6 TQ6


Sunday, 13 November 2016

NEW CAMPAIGN: The Company - A WW2 Force on Force campaign


With the present rise of nationalism, isolationism and appeasement it is looking like we should return to the halcyon days of the last time these policies ruled the roost: June 1944.  So we are leaving the dust of Malikastan and the streets of Grand Brexitia and heading to the fields of Normandy.


"The Company" campaign will follow K Company of the 508 Parachute Infantry Battalion 82nd Airborne Division through the Normandy Campaign.  Kilo Company is led by Captain McNair, born in Minnesota.

Each man in the company will have a name and will be on a roster.  The campaign will start with the miss-drop of the 82nd Airborne into Normandy, and will then follow the men as they group up and eventually fight as a unit.  The campaign will probably stop when we get bored or the 17th SS Division is pushed back.

The campaign will be both played in 15mm (Brisbane) and 28mm (Bunbury) using the Force on Force rules.  We are also thinking of using the Pulp Alley rules for some of the initial games where paratroopers are trying to group up and find weapons, and stay alive.

The Roster

The roster is an Excel worksheet that contains each man's name, if he is a sharpshooter or not, is he KIA, WIA, MIA, Under Commander (UC) or Not Under Commander (N/UC).  The players will not know the condition of men who go MIA/KIA/WIA away from the unit, they will merely remain N/UC.  N/UC men who are alive and hale will have a hidden dice which marks the probability they will join up with one of the companies cores.

A portion of the company roster (Excel worksheet)


The 1944 Normandy US Airborne Platoon OOB that will be used for Force on Force.
As Force on Force has not yet produced a WW2 supplement we have designed the vehicles using AP penetration at 100m and the armor of the various vehicles.  Here is a sub-list containing the vehicles that will be used in the campaign (no King Tigers or Tigers :( ).
The vehicles and guns for the campaign.  No special ammo given.  We may add other rules in time.


[WARNING: The boring rules commences here!  This is a Work in Progress and will be edited over time until we begin play]

The Drop

These are the rules to simulate a disrupted drop that portions of the 82nd Airborne experienced on D-Day.  Only the game master need know these rules, but they are presented here in case you are interested.  The Company is divided between eight C-47 Skytrain's.  The planes begin in groups of three.  A disruption dice is then rolled for each group of planes, the three groups are: [123] [456] [789*]

* Plane 9 contains a platoon from the 307th Airborne Engineer Battalion.  These men may land in similar areas to Kilo Company and join up.

Disruption D12:
1-2 [123]
3-4 [1][23]
5-6 [12][3]
7-8 [13][2]
9-12 [1][2][3]
The proposed campaign we are playing is for a bad drop, but we can decide to make it a better drop, by modifying the above dice type used to either a D8 or D10 instead of a D12.

Each group of planes is then given a drop accuracy probability, this denotes how close to the planes designated dropzone the plane starts to drop it's men.  The dropzone is a 2-digit number using a D6-D6, so 1-1, 2-3, 4-5, 6-6 etc.  The drop locations are indicated on the map.  The 1-1 is the actual dropzone of this particular company, west of Gueutteville and NE of Château de Bernaville (the HQ of the German 91st Luftlande Division).
The dropzone of the regiment - Not many of the regiment landed on or even close to this dropzone.
FLAK 2D6
There is a small chance each plane will be hit by FLAK.  Roll a 2D6 for each plane, on a result of 1 or 2 the plane is hit.  Planes with a dropzone starting with a 6-X (i.e. within one space of St. Mere Eglise) have a -1DRM. The plane may still drop paratroopers, roll a 3D6 to see how many men survive and exit the plane before it crashes.

Drop Accuracy D6.   The drop accuracy is how far from the designated dropzone the plane drops its men.  This is the first digit in the two digit location.   The die is modified as follows: a group of 2 planes gets -1drm and a group of 3 planes gets -2drm, +2drm if hit by FLAK.  The logic behind this is that if the planes remain in their V formation they have more eyes to find the correct DZ.

A modified result of below 1 is counted as a 1.

Drop Precision D6.  This is the second digit of the drop location, for example the Drop Accuracy rolled for a plane is 5, now roll the Drop Precision, say a 3 is rolled, this plane therefore drops its men in location 5-3.

A small area of the map.  The map is an area movement style map overlaid on the May 1944 BIGOT map of the area.  The map includes all the German positions that air reconnaissance identified.  I may make a VASSAL module for the campaign, will make it easier in the beginning, but once the company has formed up it will be less needed.  Though...if we played more than one company...

Smooth Exit D10

Each plane gets a Smooth Exit D10 (this is automatically rolled in Excel).  This represents how scattered the plane drops its men in the drop location.  A low number means the man has a low probability of finding his company.  This number denotes the Grouping Up dice for each man.

Roll D10:
1 Very Slow Exit - drop is spread out each man gets a Grouping Up dice of D6
2-3 Slow Exit - drop is somewhat spread out, roll a D6 for each man: 4+ the men get a Grouping Up D8, otherwise they are assigned a Grouping Up D6
4-6 Below Average Exit - roll a D6, on a 1-2 D6, 3-4 D8, 5-6 D10
7-9 Average Exit - roll a D6, on a 1 D6, 2-3 D8, 4-5 D10, 6 D12
10 Perfect Exit - roll a D6 for each man: 1 D8, 2-3 D10, 4-6 D12

The Excel worksheet does all this and is hidden from the players.

Grouping Up D6/D8/D10/D12
After all the planes have dropped their men then each man is assigned a dice, a Grouping Up D6, D8, D10 or D12 (see above(.  The players will not know which dice is assigned to each man.  This dice roll is automatically assigned in the Excel worksheet and is hidden from the players.  Each turn the dice is rolled for each man until he joins a CORE unit of the company, if successful the man finds one of his companies core (becomes Under Command), if not he is considered Not Under Command until the next turn.   If he rolls a 1 he has either been killed, captured or seriously wounded.  Again, players will not know this.  If the roll is successful then he finds the nearest group from his company.  He will automatically move to his own platoon when he is in the area of the platoon or is equally close to it.  The target for grouping up changes per turn.  For example, on turn 1 the target to group up is 7+, on turn 2 it is 6+ until it reaches 4+.

Finding his way Dice results, a 1 he is killed/captured/wounded, on a 2 his assigned dice drops one level (example D10 to D8), if he drops below D6 he is lost.  On a result of 3 his assigned Group Up dice shifts up one level to a maximum of D12 for the next turn.


The CORES
Each Captain, Lieutenant and Company/Platoon Sergeant is a CORE, on landing they will be marked on the map.  They will slowly grow with men as the men successfully roll to become Under Command.  The players can move their Cores towards their mission objectives by any route.  If a Lieutenant is killed is subordinate becomes the new CORE.

Turns
The length of a turn changes through the campaign.  The dice roll score required to group up also becomes easier over time, starting at 7+ and reducing to 4+.
June 6 0200-0300 Grouping Up 7+
June 6 0300-0500 Grouping Up 7+
June 6 0500-0700 Grouping Up 7+
June 6 0700-0900 Grouping Up 6+
June 6 0900-1200 Grouping Up 6+
June 6 1200-1600 Grouping Up 6+
June 6 1600-2400 Grouping Up 5+
June 7 AM Grouping Up 5+
June 7 PM Grouping Up 4+
June 8 AM Grouping Up 4+
June 8 PM Grouping Up 4+
June 9 AM Grouping Up 4+
June 9 PM Grouping Up 4+
June 10 AM Grouping Up 4+
June 10 PM Grouping Up 4+
June 11 Grouping Up 4+
June 12 Grouping Up 4+
etc..

At interesting points we will stop and play missions.  There may be more than one mission per turn, depending on our dispersed the Company is at that time.

Other units.
The Company is not alone in D-Day, so other units will appear on the map, other than protecting flanks or giving support or allowing supplies to arrive they have no influence on the company.  Though other units may fight and soften up enemy before an attack for example.

Some units will join the company, like AT Guns (Glider) or tanks and armored cars.  This will occur as these units make contact.

The Enemy
The enemy will move as well.  We may get a player to move them (maybe the game master), and therefore they will not necessarily appear where they did historically.  The enemy must make approach marches, which can be interdicted etc.

Ammunition
A critical factor on both sides, at least for the Americans in the early part of the invasion, is ammunition.  Often attacks halted on lack of ammunition, and often ground had to be given up due to the lack of ammunition.  The enemy ammunition condition will be hidden from the players.

A units available ammunition is scaled from 2  to 12, the level of ammunition corresponds to the Force on Force ammunition supply as follows:
2-3 Untenable Ammunition - Cannot fight due to low ammunition, unit will retreat to adjacent area if clear of enemy or surrender if not.  If the area contains a supplied unit it may remain in the area.
4-5 Low Ammunition, -1D
6-8 Normal Ammunition, -
9-12 High Ammunition, +1D
At the end of each turn in which a unit shared a location with an enemy, or artillery adjacent to an area containing friends and foe the unit loses D3-1 ammunition.

All German Units start the campaign at Level 7.  US Paratroopers start with 1D6+2 (3 to 8)

Resupply Routes

  • US Paratrooper Units can scrounge for ammunition, during the Campaign Maintenance Phase roll the troop quality D8, on a 4+ the unit finds 1 Ammunition.  During the Combat phase a unit not involved in combat can Scrounge a second time.
  • US Units with a Line of Communication to the Utah Beach Exit locations may roll a D3.  Paratroopers with LOC to a Glider Landing Zone (Les Forges) from 0700 on D-Day may use this Supply route instead of Utah Beach Exits.
  • German Units with a Line of Communication to the Grey Exit Locations may roll a D2.
  • A Line of Communication is defined as a contiguous set of location not crossing a red-dashed boundary that is clear of enemy units.


German Units


Well, enough for now...time for Battlefield 1 :)

I will update this post as the rules are written.

Sunday, 29 May 2016

99 Luftballon (15mm Force on Force AR)

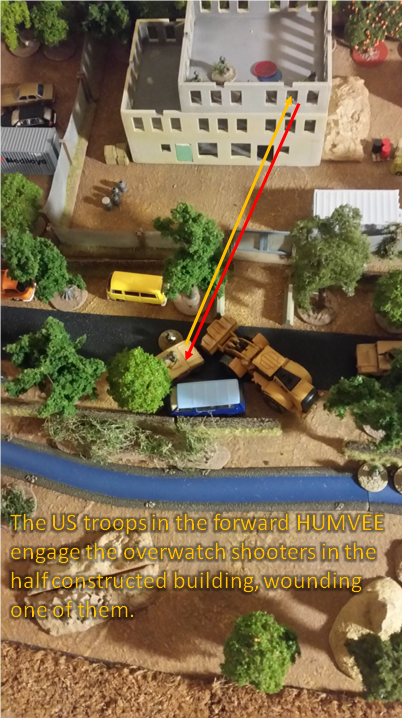
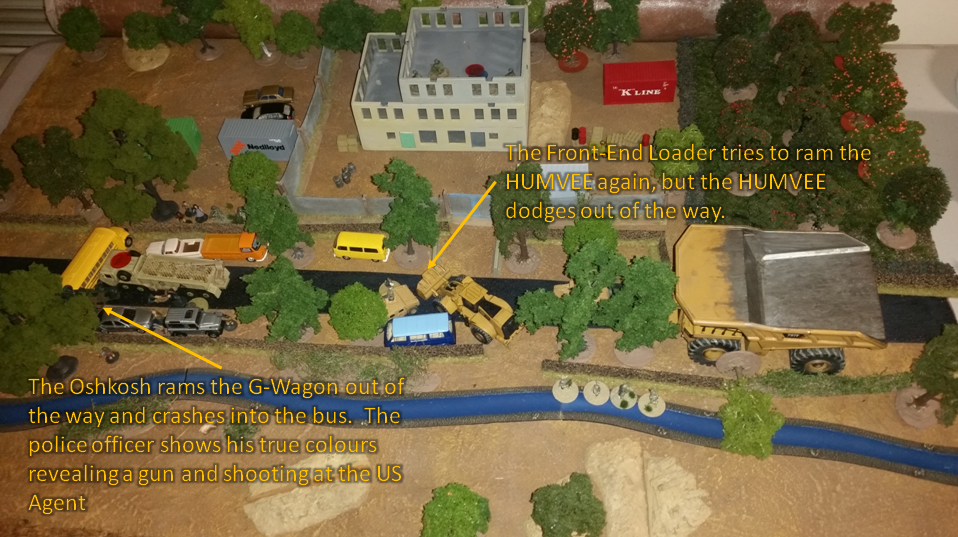
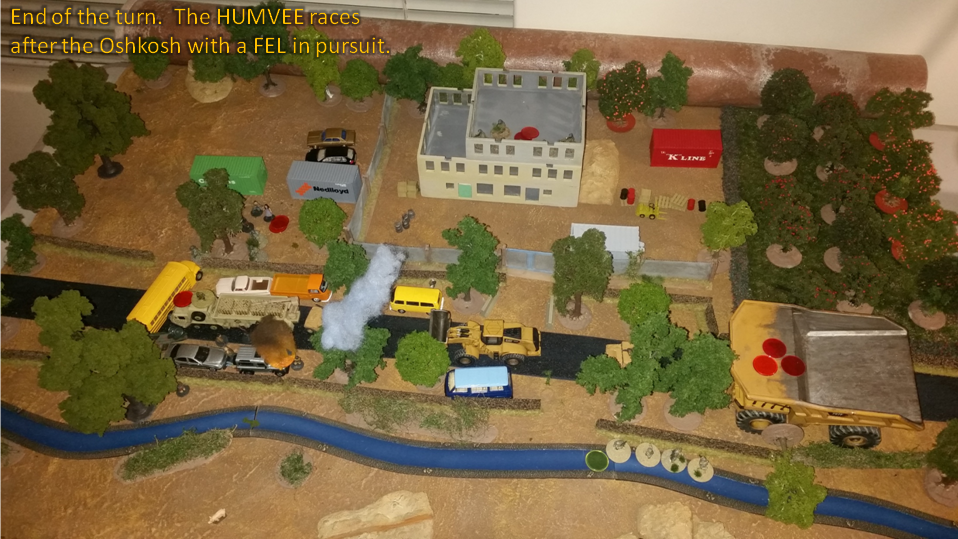
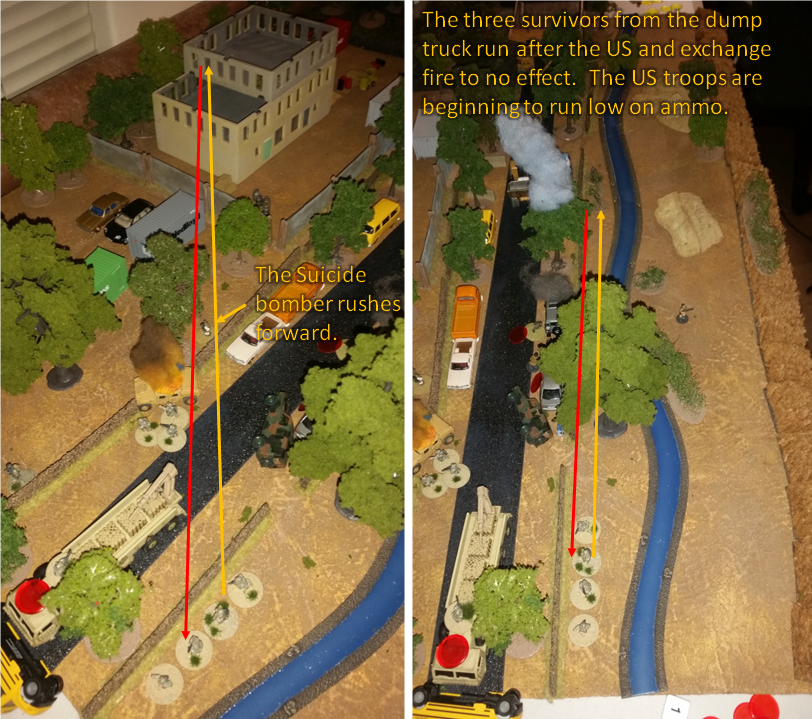
The ambush was sprung, the infiltrator in the crowd of protesters revealed a Skorpion SMG and opened fire on the US Government agent.  A large front-end loader parked in the field on the left of the convoy surged forward attempting to ram the HUMVEE and cut off the retreat of the convoy.


It was a fun game.  The board was setup in Western Australia and the two players were in Queensland (nearly 3,700km apart).  I used a smartphone with Skype to show the two players the board.  It worked very well.  We have done a few games like this (Pulp Alley see here) and FOF.

I think using a small number of troops makes this style of play possible.

The outcome was very close, down to the end of the final turn, it could have gone either way.  I think when the ambushers lost initiative it became a lot harder to control.

I was hoping the ambushers would win, getting a few tactical nukes into their hands would have been fun.  Though, I have heard that this was one of two ambushes of convoys carrying tactical nukes...

I do not think we have seen the last of Mr Pig either.

Saturday, 7 June 2014

In game terms: US Mechanized Infantry Platoon (Bradley)

After seeing Steve's Bradley's in action I must say my HUMVEE mounted US Infantry are feeling a tad vulnerable.  And, getting 15mm MRAPs seems a long way off (but, see Eureka 300 Club "kickstarter" on their website RG-31 MRAP 300Club).  A while ago I bought the Matchbox MRAP, and will see how well scaled that is to do the job.  So I think in the (hopefully) not too distant future I can upgrade my US Infantry to a Mechanized Platoon with the addition of some Bradley IFV.
A Bradley in action.

So, what does a Bradley platoon's organization look like, these sheets are meant to be printed out so that your miniatures can be setup on them prior to the game.  This is simplified for game terms, instead of reality where teams and squads are divided between vehicles.    Here is my first version for your comment:
The seat division of the squads between the four vehicles could be ignored to make things simpler.  But, I guess having to maneuver to keep squads intact would be interesting.

The platoon has access to GPMG per squad, a Javelin launcher per squad (or AT-4) and the option of LAWs.  In game terms, before the game starts decide which each squad will have access to with regards to anti-tank: Javelin, AT-4 or LAW.

Javelin has a long minimum range and is a Heavy weapon (when dismounted as a 2-man team it has two shots).  The AT-4 is a single shot but can be re-armed from any Bradley designated as carrying AT-4 (on a successful TQ).  The LAW option gives the A/T man in the squad access to LAWs which are "reloaded" without the need to go to the Bradley, but requires a successful TQ.  The LAW is also a Medium weapon.

The platoon also has a non-organic medic and FO option.  If they have these I am not sure where they squeeze in.  Do they displace two regular platoon members?  I am also not sure if the Platoon commander vehicle has an extra crew-man.  There is one seat available, either for an extra crewman, the medic or the FO.

What do you think?


Tuesday, 3 June 2014

AAR - Ambush in San'boks City

With Kevin running off to 'forn parts' (well, Western Australia), we haven't done a lot of FoF in Brisbane recently. So I was more than happy - as well as a little anxious to see how it would play - to run a scenario for some new players to FoF. They were an enthusiastic bunch, who have done great job of building their forces and terrain (all in a very short time), and were keen to get to grips with the rules.

The scenario was fairly straightforward - a platoon of Americans in their Bradley IFV's are en route back to their base after a routine patrol. Passing through a small village, however, the third vehicle in the convoy is hit by RPGs and disabled; several of the occupants are wounded, and must be evacuated to safety. The insurgents close in, hoping to kill or capture Americans...

The leading Bradleys pass though the village...

The US commander was at the tail of the convoy, blocked off from the rest of his unit - the insurgents had pushed a car (the legendary Golden Holden, no less !) across the road. He quickly decided to dismount the fireteams from his vehicle to establish a perimeter. The other squads and their vehicles would help to secure the area, and recover the wounded. Once they were safe, he intended to evacuate them by the quickest route out of the village.

However, one of the premises of our campaign is that 'the enemy gets a vote'... RPG's and Dshka rounds rained down on the Americans from all sides. One fireteam was pinned down by a hail of fire from an alley, and took a further casualty; dragging him into the nearest building, he was discovered to be dead. Squad two backed their Bradley up next to the disabled vehicle, and debussed; one team decided to charge into the nearest group of insurgents hiding behind a truck, fully expecting to be backed up by the rest of their squad. The ensuing knife-fight left all four team members down; the other fire team remained in the vehicle (failed TQ to assault) - one man even claimed to have been wounded (Fog of War card, 'Man Down'), but was found to be unharmed when checked.
The combat around the truck

Another view of the failed assault
 At this point, superior discipline and firepower began to assert itself. Squad one established itself in a building overlooking the 'square', and provided effective overwatch; its Bradley levelled a building - together with a group of insurgents manning a Dshka - with a well-placed TOW missile (overkill, perhaps, but very effective). The team from Squad two was rescued and medicated, and all casualties were transferred to its vehicle.

The building after the TOW demolished it.
The platoon leader ordered his Bradley to push the Holden out of the road; its cannon made short  work of the insurgents in the alley.
The platoon leader cleans the alley of insurgents
 At this point, discretion was judged to be the better part of valour, and the Americans decided to withdraw with all their casualties. The insurgents were not able to hinder them further, as they had taken too many casualties themselves. However, the Americans had lost one killed, and six seriously wounded - a marginal insurgent victory.

Overall, an enjoyable game, and fairly tense at times when it looked as if the insurgents were going to overrun the Americans. The new recruits had some appalling dice rolls, but persisted in completing the mission, and will hopefully contribute to the new campaign that our 'evil genius' (Kevin) is putting together - see recent posts on this blog. I'm looking forward to it !


Sunday, 30 March 2014

AAR - Operation [REDACTED]

"What happened at Malika Airport last week?"

"Nothing happened." replied the US Spokesman to the press at the UN HQ.

The truth is more terrifying than anyone could imagine.
The Russian kill and wound the South African guards and steal the UN QRF Medivac helicopter
A heavy firefight is believed to have occurred at the western edge of the airfield.  A three way struggle occurred between the Russians, the UN and the Hotakistanis.  A fourth force was also rumoured to be involved, and this was confirmed by a release from Wikidrips.  We played a massive 4-sided mission.  Operation Democritus begins (see Mission Briefing here)

Unknown to the UN forces the Russians had discovered a stolen nuke (of Russian origin) on one of the crashed aircraft at the airfield.  The nuke "belonged" to the Hotakistanis.  As the Russian moved to recover it a secret force of Hotakistani revealed themselves and a race was on, the Russians to recover the bomb and the Hotakistani to set off the bomb.  The UN, unaware of the nuke, raced to turn the Russians back to their part of the base.  In the vicinity of the aircraft was a secret NSA base which would result in the operation being removed from all the annals of the world (or so they thought!).

The fight started with a section of Russians attacking the helipad at the southern end of the airfield.  Their plan was to steal a helicopter, retrieve the bomb and then fly it back to Russian territory.  The South African guards at the helipad were taken by surprise by the Russians and they fell quickly.

Meanwhile at the west end of the airfield the Russians advanced on their secret objective, the nuke in the crashed airliner.  The nuke had been stolen by the Hotakistanis and crashed on the runway on the first day of the invasion, their plan had been to explode the bomb if they failed to secure the main UN base.  They had been defeated and the bomb had never been set-off.  The plane had then been dragged to the wrecking yard at the airfield, the UN unaware it contained a nuke.
The Main Maintenance Workshops and the wrecked planes.
The Russian rushed into the Main Maintenance Workshops, they heard the helicopter had been captured and that their comrades had also captured a BMP-1 which would soon arrive (Turn 4) to assist them in their task.
The Russian arrive at the MMW

The Russian paratroopers catch sight of their objective, the crashed airliner is in sight.
On a course to intercept the Russians was a motley UN force thrown together from the remnant units at the airfield.  The UN force included a section of South Africans, a section of British, a squad of Americans, a P4 Peugeot with French special forces and a fire team of Australian special forces.  The UN force moved into the buildings overlooking the main wrecking yards.  They battled to breach one of the buildings but were soon in overwatch positions above the yards.
A team of South Africans show the Aussies how to break in to a building.  Mark has painted his Eureka Miniatures Australians (most envious!)
Unknown to the Russians or the UN a third force was hiding just over the outer fences of the airfield.  The Hotakistanis had come to the realization that the Russians had discovered the bomb and they now raced forward to arm the bomb and deny the airfield to the UN.
The Hotakistani platoon run through a minefield losing three men, and cut through the chain-link fence.  The race is on!
The Hotakistani swarmed from their hideout, ran through a minefield, losing three men seriously wounded, and then breached the outer fence.  The Russians soon came under fire from the Hotakistanis.  This would turn into a bloody fire fight ending with only one Hotakistani left alive and only four Russians.
The Russian run towards their objective, but accurate fire from the Hotakistani stops them in their tracks
Unknown to the Russians they had run past a hidden group of Hotakistani agents from their Special Activities Detachment (SAD).  The SAD team had been hiding in one of the upper floors of a workshop, from where they could observe the wrecked jetliner.  The SAD men popped up and poured fire into the running Russians.  The Russians were soon able to neutralize this threat but at a cost.
Russians ambushed by the SAD men.  The Russian leader, Lt Razputin flexes his muscles.
The UN could see the firefight from their positions in the office blocks.  The commander ordered the French patrol to make contact with the Russians.  The French Special Forces moved forward to order the Russians back to their compound.  The Russians failed to move, saying they could not understand German.  At about this time a runner brought up a decoded message which showed the UN commander that the Russians were attempting to retrieve a Empty Quiver - a stolen nuclear bomb.

The French drive up to the advancing Russians, a tense stand-off ensues.
The firefight near the workshops intensified, with the Russians losing a few men.  The French supported the Russians by firing at the Hotakistanis THROUGH the Russian forces, but miraculously no Russian went down to this "semi-friendly" fire.
The firefight grows in intensity.  The French come to the Russians assistance, but fire through the defending Russians.
After softening up the Russians the Hotakistanis charge in with grenades and bayonets, killing four of the Russians.
The first of many close quarter combat.  In this one the Russians are wiped out.
The gunfire and explosions had a dramatic effect in the NSA Darpa base at the other end of the wrecking yard.  Several containers started to shake and blood curdling screams could be heard from within their confines.  Soon the containers failed and out poured a fourth force.  Within the container cages were torn and smashed.  Unfortunately, the nature of this new force has been redacted by the NSA.  The first casualties of this new force were the two NSA agents in the building.

Unfortunately the image of this event has been redacted.
[REDACTED]
Luckily the NSA is a sieve, and we can therefore show you these images:
NSA DARPA EXPERIMENTAL ALIEN DIVISION
The fourth force was some form of alien or synthetic lifeform.  They surged forward, loping, skittering, hunting any human they could sense.  The UN force was the first to see them, the men either puckered up or lost sphincter valve control.
The stolen helicopter lands, the Russians as yet unaware of the new nearby threat.
The Russian helicopter and BMP arrived around about now.  The BMP was soon to become a thorn in the UN side, it main gun a threat to the advance of their troops and a threat to the UN vehicles.  The South Africans had been checking through the vehicles parked in the yards and found a Ratel and a Rooikat in operable condition, they mounted these vehicles, though only the machine-guns could be operated.
The Russian BMP arrives, it survives the operation, but gets hit by 3 to 4 RPGs.
The firefight in the centre continued with multiple casualties on both sides.  The UN taking pot-shots at the participants.  The Hotakistanis realised that the central yard was becoming too dangerous and began a flanking move to get to the airliner.
Hotakitanis begin a flank move to reach the airliner
About now the aliens started to disgorge from the NSA buildings, the shocked UN force poured a withering fire killing into these horrific beings as they ran across the road towards the UN position.  One of the alien queens mounted a wall (and rolled a 1 for the Reaction test, received a card, Man Down, rolled a D10 for the ten alien teams and rolled a 9!  The queen.  She died as she fell from the wall.  Rather anti-climatic to the mirth of the other players.  Especially as I have had a uncanny ability to fall off walls in another game we play!)
An ignominious end to one of the alien Queens
The Aliens swarmed forth, though many died, many advanced on the Russians who had just debussed from the helicopter.
The Aliens rush the Russians
The Aliens began to suffer from an inability to martial themselves to charge into close quarters (by the end of the game I had rolled at least ten "1s" with a D10 for the close combat TQ check.  Not just failing but failing with 1s!)
One successful assault out of four attempts!  The Hotakistanis attempting to range in on the aliens, but the UN intervened shooting down the two Hotakistani snipers before they could fire on the aliens.
The Aliens attacking the UN forces faced a wall of overwatch fire.  Very few aliens made it, most dying in puddles of acid.
A wall of overwatch lead puts an end to the alien advance on the UN forces
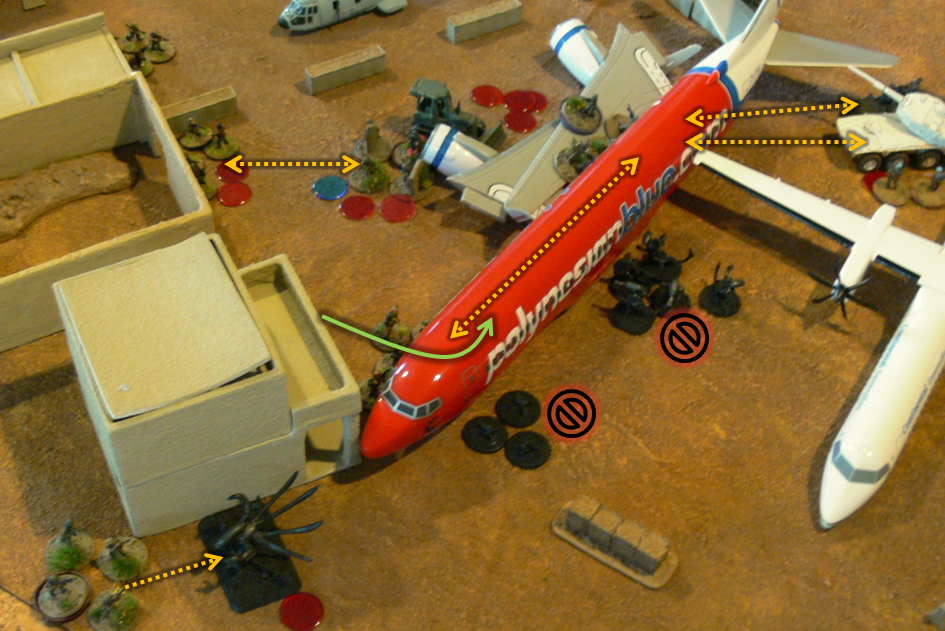
The Russians, ignoring the UN request, breached the airliner and advanced to the bomb in the centre of the aircraft.
The Russians ignoring French order breach the plan and advance to the bomb, but suffer wounds and cannot carry the bomb.
The aliens now spotted that there were walking incubators in the airliner and started to breach the aircraft, but once again they failed to muster the will to attack the Russians in the aircraft.  The Hotakistanis also breached the plane but were ambushed by FBS Russian agents, but they overcame the two Russian agents and attacked the fireteam at the bomb, wounding two of the Russians.  The Russians could now not retrieve the bomb with the four men required to retrieve and evacuate the bomb.
The aliens once again failing to muster themselves to assault the walking incubators.
The UN now suffered two setbacks, both their overwatch buildings caught fire and the UN had to rapidly evacuate their advantage points (both Reaction Cards, one played by the Hotaksitanis and one by the aliens, the UN player was not impressed)
Bad luck, the first of two fires in the UN held buildings
The Russian now joined the alien killing spree, firing on the aliens.  They wounded two aliens, then the aliens charged them, losing two more to the Russians, and then in close combat the Russians dispatched the last alien.
Russians wiping out the aliens.
The Russian, after killing the drones, turned on the queen and quickly killed her.
The Alien queen dies.
The firefight in the yard continued, devastating both the Hotakistanis and Russians.  A team of Hotakistanis entered the plane and took down the Russians with UN "assistance" (the Rooikat and P4 had moved up to fire on the airliner).  The aliens clawing at the outside of the plane once again fail to muster the will to charge into the plane!  The Rooikat was destroyed by the Russians.

The South Africans engaged the Russian BMP with an RPG, but after two hits could not penetrate the armour.  The BMP responded to the fire, also with little effect.
The Hotakistanis clear the plane with UN assistance, while the aliens twiddle their thumbs!
The aliens now exacted some revenge on the UN, a group of five aliens surged into a fire team of Americans, killing them all.  The aliens were soon killed by the Australian SASR.
Aliens munching on the US fire team
The aliens finally entered the plane and killed the Hotakistanis in the plane.  A final Hotakistani surge to breach the aircraft and set off the nuke was withered under heavy fire, but in the end one of the Hotakistani agents got to the bomb.  He started to arm the bomb but was interrupted by incoming UN forces (he required a full turn so he was too late and the mission ended).  The bomb was captured by the UN. Only four Russians were left standing and the last Hotakistani killed himself rather than be captured.  The surviving Russian fell back over the perimeter fence and were extracted by a Russian force later in the day.

A reporter at the airfield reported that the Russians had attacked the UN.  The Russians said that the bodies in the reporters photographs said to be Russians appeared to be a Malikstani militia men, pointing out that none of the uniforms contained Russian badges or flags.  The UN reported that the photographs were fakes or were taken during the initial invasion a month before.

There was never a fight.

There was never a bomb.

The UN and Russians are still on good terms.

There were certainly no "unexplained" events.

Period.

The aliens [that never did exist] were also all killed, though one [of the non-existent] aliens had escaped with a victim...

A bloody four-player four-sided game that ran very smoothly.  Probably our biggest game ever, with over four platoons of infantry.  The Force on Force rules held up well and we finished the game in good time.  Initiative was gold during this game, the ability to have overwatch was precious indeed.  Initiative bounced around, but the UN was able to hold it for most of the game.  The UN captured two vehicles which helped them hold on to initiative for most the game.

The aliens inability to muster themselves to attack and the ignominious end to the one queen resulted in lots of [rude] chortling.    In the end it was a UN victory as they received a bonus 20VP when the Russians and Hotakistanis failed in their missions.  But it was still narrow, with the UNs 57VP vs. the Russians 51VP.

The secret arrival of aliens in the campaign certainly led to shock among the three regular players.  I wish I had a picture of their faces as I setup the 40 drones and two queens.  It was classic.

Sadly, this is going to be my last game for a long time to come, though I hope the campaign will continue.  I will see if I can get players keen in WA, and I hope the Queenslander's keep it going.

Force on Force has enabled us to play some truly enjoyable games.  At least 41 of those games have been reported on this blog.  Not to mention the excellent players Mark, Bill and Shane.  And all the other guest players that have been involved in the 3 years we have played this campaign.

To anyone who has visited our blog I hope we have been able to entertain or inspire you to further gaming.  I hope this is not the end and we will soon be playing the campaign in both Queensland and WA.  If anyone this side of  Sagittarius A wants to join in to play missions in the campaign please PM me.